
Intro: How Strong Is Raider in Nightreign?
If you're diving into Elden Ring Nightreign and want a class that can eat hits, dish out posture-breaking combos, and still help your team, Raider is your best pick. This build isn’t just fun—it’s ridiculously strong. From slamming bosses into the dirt to tanking entire rooms, the Raider is built to stand up close and punish enemies hard.
In this guide, we’ll break down everything you need: best weapons, relics, combos, and strategies to make your Raider build feel broken in the best way. Whether you're running solo or backing up your squad, this setup gives you all the tools to carry.
Basic Raider Combos to Master First
The Raider in Elden Ring Nightreign stands out for his brutal up-close damage and reliable poise-breaking attacks. To get the most out of him, you need to learn a few basic move sets.
-
Charge Attack Combo: Hold the R2/RT button to unleash a powerful charge. It hits hard and knocks down enemies by crushing their posture. Follow it with quick strikes to keep the damage rolling.
-
Jump Attack Chain: Equip dual colossal weapons and press L1/LB while airborne. This deals insane posture damage and can stagger bosses fast.
-
Weapon Skill Buffs: Use FP-efficient weapon skills to boost your output. Raider doesn’t rely much on FP, so you can save it for occasional power moves.
💡 Key Takeaway: Always lead with a charge or jump attack to break enemy stance early. Follow up with light combos or special skills to keep pressure high.

Using Retaliate Effectively in Battle
One of the core mechanics that makes the Raider build overpowered is Retaliate. This defensive skill lets you reflect damage and regain stamina—a perfect tool for clutch situations.
-
How to Activate: Press Y/Triangle + LT/L2 to trigger. It’ll reflect damage back and allow stamina to recharge.
-
Best Time to Use It: When you’re low on stamina or expecting a big hit. Use it during boss wind-ups to avoid damage and punish immediately.
-
Bonus: Some relics boost the number of uses or reduce the cooldown on Retaliate, so keep an eye out for those early game.
💡 Key Takeaway: Retaliate isn’t just defensive—it’s your escape and offense tool rolled into one. Mastering its timing gives you a huge edge.
Totem Stella: Your Secret Weapon
Totem Stella is more than just a revive tool—it’s the Raider’s utility powerhouse. It offers damage immunity, buffs, and team support all at once.
-
Damage Immunity: When activated, it gives you 5 seconds of invulnerability—great for dodging a boss’s strongest moves.
-
Bonus Effects: Standing near the totem boosts your damage, and some relics even heal you when you fight near it.
-
Team Utility: You can revive fallen teammates quickly with it, making you a core part of any co-op fight.
💡 Key Takeaway: Use Totem Stella not just for saving teammates but for offense too. Pop it mid-fight to tank through chaos and land safe attacks.
Top Weapons for the Raider Build
Choosing the right gear makes your Elden Ring Raider build feel truly broken. You’ll want weapons that deal posture damage, cover wide areas, and apply status effects when possible.
Here are some of the best options:
-
Axe of Godfrey: Comes with Regal Roar and charge-boosting power. Ideal for raw damage.
-
Giant-Crusher: One of the hardest-hitting weapons in the game. Heavy, but worth the investment.
-
Staff of the Avatar: For fights involving holy damage, this is your go-to. The Tree Slam covers a big area.
-
Prelate’s Inferno Crozier: Applies fire damage and deals tons of stagger to humanoid bosses.
-
Ghiza’s Wheel (Pizza Cutter): Great for bleed builds, especially if you want quick status buildup.
-
Rotten Greataxe: Applies Scarlet Rot, which melts boss HP over time.
💡 Key Takeaway: Match your weapon to the boss type—fire for humanoid, holy for weak-faith enemies, bleed or rot for everything else.

Relics That Make Raider Even More OP
Relics are the passive backbone of your Raider Elden Ring Nightreign build. The right choices can boost your survivability, posture damage, or stamina regen.
Here are the best picks:
-
Skill Damage Booster: Amplifies damage from your abilities like Retaliate and weapon skills.
-
Posture Heal Relic: Restores partial health every time you break enemy posture—essential for Raider.
-
Colossal Weapon Health Regen: Keeps your health up while swinging big weapons. Great synergy for dual-wield setups.
-
Max Stamina Increase: Lets you spam combos longer before running dry.
-
Ultimate Gauge Booster: Helps you get back your Totem Stella and Retaliate skills faster.
💡 Key Takeaway: Stack relics that enhance survivability and skill uptime. Prioritize health-on-posture-break and cooldown reduction.
Early-Game Raider Tips: What to Do on Day One
Getting your Raider build going early means farming runes, grabbing good gear, and learning how to keep your team alive.
-
Farm Runes Quickly: Hit up early camps and rune-dense zones. Get your first colossal weapon ASAP.
-
Be the Team Anchor: Your role is to draw aggro, tank hits, and revive allies. Your big health pool lets you take more risks.
-
Use Dual Colossals from Start: Even low-level colossal weapons make a big difference. Use jump attacks to stagger enemies consistently.
💡 Key Takeaway: Focus on tanking and posture breaking early on. You’ll carry your team while scaling into a raid boss yourself.
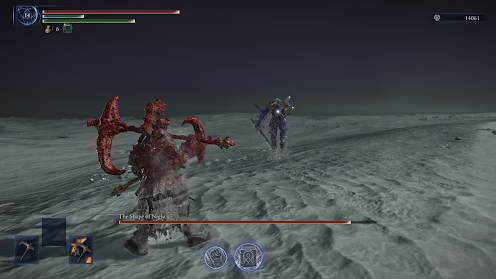
Boss Fight Strategy: How Raider Controls the Arena
In boss fights, the Raider’s job is simple: break posture, take heat off the team, and punish relentlessly. With the right timing, you can even solo tougher bosses.
-
Grab Aggro Fast: Use jump attacks and charged R2 hits to get bosses to focus on you. This gives your mages and ranged allies space.
-
Face Tank Wisely: With relics and Totem Stella, you can take hits that would kill other classes. Use Retaliate to recover stamina and hit back harder.
-
Crowd Control: Against duo bosses, try to hit both at once. Your wide weapon swings and AoE totem damage can stagger them together.
💡 Key Takeaway: Let bosses swing first—then retaliate. You're not dodging everything; you're soaking it, returning damage, and setting up crits.
How to Handle Fast and Aggressive Bosses
Not every enemy will play by your rules. Fast or jumpy bosses like Tree Sentinels and Fell Omens need a slightly different approach.
-
Time Your Retaliate: When fast enemies rush in, pop Retaliate just before impact. It reduces damage and opens up punish windows.
-
Totem Setup: Use Totem Stella near corners or tight spaces. If the boss gets staggered there, you can land full jump attack chains safely.
-
Exploit Weak Poise: Many fast bosses have lower poise. A few well-placed jump attacks or charge slams can stun-lock them.
💡 Key Takeaway: Don’t try to out-speed them—just break their flow. Use your tools to slow the fight down and gain control.
Status Effects and Element Matchups for Bosses
The right status effect can make some bosses a joke. Raider’s build allows for bleed, rot, fire, and holy damage—each useful in different scenarios.
-
Scarlet Rot: Weapons like the Rotten Greataxe inflict rot quickly, draining boss HP over time. Great for longer fights.
-
Bleed: Ghiza’s Wheel and similar weapons stack bleed damage fast. Useful against large health pools.
-
Fire Damage: Use Prelate’s Crozier against humanoid bosses. The fire damage plus posture break is deadly.
-
Holy: The Staff of the Avatar’s Tree Slam is perfect against undead or holy-weak enemies.
💡 Key Takeaway: Match your weapon’s element to the boss’s weakness for massive pressure and easy wins.
Final Tips for Breaking Boss Posture Fast
The Raider’s playstyle revolves around poise-breaking enemies to set up high-damage punishes and crits. These extra tips will push your gameplay further:
-
Use Jump Attacks Frequently: Especially with two colossal weapons. You’ll land posture breaks within seconds.
-
Retaliate Mid-Fight: Even if you’re not sure you’ll land a counter, Retaliate helps reset your stamina and reduce incoming damage.
-
Totem as Offense: Place Totem Stella during a boss's wind-up. It can interrupt and stagger, giving you time to combo safely.
-
Stack Relics with Stagger Perks: Some relics further increase posture damage—prioritize these for big boss fights.
💡 Key Takeaway: Think of every combo as building up to a posture break. Once you get the stagger, that’s your window to burst.
Conclusion: Raider is Built to Break Bosses
If you want to feel like a raid boss in Elden Ring Nightreign, Raider is your go-to class. With the right weapon setup, smart relic choices, and perfect Retaliate timing, you can solo bosses, carry your team, and never worry about being too squishy. Use Totem Stella as both an offensive and defensive tool, rotate posture-breaking combos, and let your build do the heavy lifting.
With this guide, your Raider build in Nightreign should be more than ready to take on anything the game throws at you.
FAQs: Raider Build in Elden Ring Nightreign
Q: What’s the best weapon for Raider?
A: The Axe of Godfrey is top-tier, thanks to its powerful Regal Roar and charge synergy.
Q: How do I stay alive in tough fights?
A: Use Retaliate for stamina regen and damage reduction. Also, rely on relics that heal on posture break.
Q: Is Totem Stella only for revives?
A: No. It also provides invulnerability, offensive buffs, and posture-breaking AoE during fights.
Q: Can I solo bosses with Raider?
A: Absolutely. With dual colossal weapons, proper relics, and smart positioning, solo play is very viable.
Q: Which status effect is best?
A: Scarlet Rot and Bleed are the most effective across multiple bosses, especially with fast build-up weapons.
🎮 Meet Haplo Gaming Chef 🍳
Level 99 Kitchen Warrior here! I'm on a quest to transform your gaming sessions into epic culinary adventures. When I'm not farming rare ingredients in MMOs, I'm crafting real-world recipes inspired by your favorite video games.
Specializing in: • Game-inspired recipe creation • Cooking quest guides • Power-up snacks for gaming sessions • Achievement-worthy meal prep
Join my party as we explore the delicious intersection of pixels and plates. Whether you're a casual foodie or a hardcore gamer, there's always room at my crafting table! #Gaming #GamingGuides #GamingChef #HaploGamingChef For More Visit: https://haplogamingchef.blogspot.com/
Follow Me!
https://bsky.app/profile/haplogamingchef.bsky.social
https://www.threads.com/@haplogamingchef
https://www.twitch.tv/haplogamingchef
https://www.pinterest.com/haplogamingchef
https://www.youtube.com/@HaploGamingChef
https://www.tiktok.com/@haplogamingchef
https://flipboard.com/@HaploGamingChef
https://x.com/HaploGamingChef
https://www.instagram.com/haplogamingchef
https://www.facebook.com/HaploGamingChef
https://www.linkedin.com/in/haplogamingchef
https://haplogamingchef.blogspot.com
https://www.tumblr.com/haplogamingchef
https://medium.com/@haplogamingchef
Google Business Profile: https://g.co/kgs/SLVFpRa


No comments:
Post a Comment