Trending Guides

Showing posts with label Lies Of P: Overture. Show all posts

Why Lying Matters in Lies of P – An Essential Game Mechanic and Trophy Guide


If you’ve played Lies of P, you’ve probably noticed the game's unique take on decision-making, especially regarding the choice to lie or tell the truth. As a Souls-like game, it’s packed with its own brand of challenges, but what makes it stand out is its innovative use of a seemingly simple mechanic that’s deeply integrated into the narrative: lying. While Lies of P may draw inspiration from games like Dark Souls, it carves its own identity by intertwining lies with gameplay progression and trophies.

In this guide, we’ll dive into why lying is so significant, how it influences your game experience, and why it’s vital for trophy hunters. Trust me, if you want to see all Lies of P has to offer, understanding this mechanic is crucial.


The Impact of Lies: Why Your Choices Matter

In Lies of P, the choices you make can significantly affect your journey. The core mechanic that drives this is your decision to lie or tell the truth. From the very beginning, the game invites you to make these decisions, and your choices will echo throughout the story, impacting dialogues, quests, and even the ending.

For the first playthrough, you should focus on either always lying or always telling the truth. This consistency is key—while it might seem tempting to mix things up, doing so can result in missing out on important story elements and trophies. So, what happens if you lie? Well, let’s explore that.


Lying: A Path to Humanity

One of the most intriguing aspects of Lies of P is how lying affects the character of Pinocchio. In many ways, it mirrors the classic tale of Pinocchio’s nose growing whenever he lies. In this game, the more you lie, the more human Pinocchio becomes. This ties into a larger thematic element: records.

As you progress, you’ll encounter records at the hotel. While puppets (the enemies in the game) typically ignore music, you’ll notice something different when Pinocchio plays these records. Playing these tracks increases his humanity, and this transformation happens as a result of lying.

It’s not just a superficial change either. The more humanity you gain through lying, the better your experience becomes. There’s an additional secret layer that becomes accessible only through consistent lying. You’ll unlock special dialogues, items, and even a secret ending that is unique to the path of lies.


The Nose: A Subtle Indicator of Your Journey

If you pay close attention, you’ll notice that Pinocchio’s nose grows as you continue to lie. This is a subtle yet powerful indicator of your moral trajectory. The longer your nose grows, the more important events will unfold. The longer you stick to the path of lies, the more significant the consequences become, often unlocking items and quests unavailable if you tell the truth.

Many players miss this detail on their first run because the game doesn’t overtly focus on this mechanic. However, by the end of the game, your nose will likely be so long that you’ll discover something truly special: a unique item tied to your choices. This adds another layer of replay value to Lies of P, encouraging you to experience the game multiple times—once as a liar and once as a truth-teller.


Truth-Telling: The Honest Path

On the other side of the coin, telling the truth also brings its own rewards. The game offers distinct items and quests depending on whether you lie or tell the truth. Each playthrough offers a unique experience, and the items you gain while being truthful will differ from those you would get by lying.

The most significant difference here is that your character won’t develop the same level of humanity if you choose honesty. As a result, your interactions and gameplay will feel different. The decisions you make will impact not only the gameplay but also the storyline. If you decide to tell the truth, you'll unlock alternate paths and possible endings that explore a more virtuous version of Pinocchio.


Multiple Endings and Replay Value

Perhaps the most exciting part of this mechanic is how it ties into the game's multiple endings. You’ll find that by either lying or telling the truth consistently, you’ll unlock two entirely different endings. These endings not only reflect your choices but also reward you for fully committing to one path or the other.

Additionally, your actions have a direct impact on quests. If you lie, you may gain certain advantages, like unique items, while the truth-teller will unlock different sets of rewards. It’s a system that encourages replaying the game, giving you a reason to dive into the story again to see what happens when you switch sides.

The game cleverly integrates this system into the narrative, ensuring that no matter which route you choose, you feel rewarded for your commitment. In fact, the different endings are designed to give you a full experience of the world of Lies of P and its lore.


Trophy Hunting: The Key to 100% Completion

For all the trophy hunters out there, this mechanic becomes crucial to achieving 100% game completion. Many of the game’s trophies are locked behind the choice to lie or tell the truth. Since you’ll need to complete the game both ways to collect all the trophies, a single playthrough won’t cut it.

With a full walkthrough of Lies of P, you can find all the collectibles and quests tied to each decision. However, the key trophies are often locked behind the moral path you take. By sticking to one route—either lying or telling the truth—you’ll ensure you can fully unlock all the trophies available in the game. Remember, these can’t be obtained in a single run, so you’ll need to commit to at least two complete playthroughs to get everything.


Final Thoughts: The Duality of Lying and Truth

In conclusion, the mechanic of lying in Lies of P is not just a quirky feature—it’s an essential part of the game’s design. It affects your character's humanity, the progression of the story, and the very items and rewards you’ll encounter along the way. Whether you choose to be a liar or a truth-teller, both paths are richly rewarding, and the decision you make will influence the entire game.

For those seeking 100% completion, this mechanic adds incredible replay value. By committing to both paths, you can uncover every secret, unlock all trophies, and experience the full depth of Lies of P’s world.

So, which path will you choose? Will you lie your way to a more human Pinocchio, or will you stay truthful in your journey? The choice is yours, and it will undoubtedly shape your experience in this dark and atmospheric world.

Conclusion

To sum up, the mechanic of lying in Lies of P offers a unique and intriguing layer to the game. Whether you choose to lie or tell the truth, it impacts everything from your character's humanity to the items you unlock, quests you complete, and the multiple endings available. Trophy hunters will especially appreciate the replay value, as many trophies are locked behind these choices. So, if you want to experience everything the game has to offer, be sure to complete one playthrough where you lie and another where you stick to the truth. This duality makes Lies of P not just a one-time playthrough but a game you'll return to, exploring every twist and turn the story offers.


FAQ

Q: Does lying affect the story in Lies of P?
A: Yes, your choice to lie or tell the truth changes dialogues, quests, and the overall storyline.

Q: What happens when you lie in the game?
A: Lying makes Pinocchio more human and unlocks unique items, quests, and a secret ending.

Q: Do I need to lie the whole game to get the best rewards?
A: Yes, lying consistently unlocks special items and a different ending compared to telling the truth.

Q: How does lying affect trophies?
A: Many trophies are tied to either lying or telling the truth, requiring two playthroughs to collect them all.

Q: Can I switch between lying and telling the truth?
A: It's best to choose one path (lie or truth) for your entire first playthrough to unlock specific rewards and endings.


Stay Connected with Haplo Gaming Chef

Haplo Gaming Chef blends gaming guides with casual cooking streams for a truly unique viewer experience. Whether you’re here for clean, no-nonsense walkthroughs or just want to chill with some cozy cooking content between game sessions, this is the place for you. From full game unlock guides to live recipe prep and casual chats, Haplo Gaming Chef delivers content that’s both informative and enjoyable.

You Can Follow Along On Every Major Platform:

YouTubeTwitchTikTokInstagramTwitter/XThreadsBlueskyPinterestFlipboardFacebookLinkedInTumblrMediumBlogger, and even on Google Business.

No filler, no fluff—just straight-up help for gamers and fun for foodies. Join the community today!
For More Guides Visit: Haplo Gaming Chef Website!

Share:

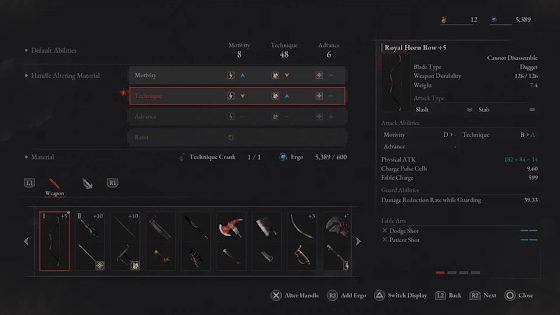
Lies of P Weapon Guide: Optimizing Your Build for Maximum Damage


Weapon Guide: Optimizing Your Build for Maximum Damage

In Lies of P, one of the most crucial decisions you'll make is choosing the right weapon for your character build. Whether you're focused on raw physical damage or precision strikes, picking the right weapon can make all the difference in your gameplay. In this guide, we’ll walk through everything you need to know: from skill allocation, weapon selection, to optimizing your build for maximum damage output. Let’s get into it!

Understanding Your Build: Key Stats and Weapon Compatibility

When you start building your character, the first thing you need to do is figure out your main stats. These stats determine the type of weapon that works best for you. The main stats you’ll focus on in Lies of P are Determination, Technique, and Progress. Each one corresponds to different types of weapons and combat styles, so knowing what each one does is essential to making the right choice.

  • Determination: If you’re going for heavy damage and brute force, determination is your go-to. It focuses on using large weapons, which deal massive damage but require a lot of stamina and weight capacity.

  • Technique: For those who prefer speed and agility, technique is perfect. It’s all about light, fast weapons that allow for quick attacks and fluid combat.

  • Progress: This stat balances speed and defense, making it a good choice for players who like to mix offense with a bit of defense. Weapons here tend to be quicker than the heavy ones but more durable than the light ones.

Why Weight Capacity Matters

One of the key factors when choosing a weapon is weight capacity. This stat is important because heavy weapons require more stamina and higher weight capacity to carry effectively. If your character doesn't have enough weight capacity, you'll find yourself slower, less mobile, and less effective in combat.

When focusing on Determination, you’ll likely need to increase your weight capacity so you can carry those powerful, slow-hitting weapons without becoming encumbered. The last thing you want is to be too slow or weighed down when trying to land a powerful blow.


The Importance of Weapon Handles

Now let’s talk about weapon handles. These are often overlooked, but they play a crucial role in how your weapon scales with your stats. The handle affects the weapon’s damage type and how it interacts with your character's abilities. For example, if you have a handle that scales with Technique, your weapon will likely be lighter, faster, and designed for quick strikes.

If you’ve invested heavily in Determination, you’ll want a handle that boosts Resolve or Progress since those are the stats that handle large weapons. Choosing the right handle is essential, as it ensures that your weapon’s scaling aligns with your chosen build. It’s not just about choosing a blade with high damage numbers; it’s about ensuring your weapon's scaling aligns with your playstyle.

Choosing the Right Weapon for Your Build

The best weapon for your build depends on several factors. Here’s how you can make your choice:

  • Determine Your Focus: Are you investing in Determination (for heavy weapons) or Technique (for light, fast weapons)? Knowing your primary stat helps narrow down your options.

  • Check the Handle Scaling: A weapon’s handle can scale with either Determination, Technique, or Progress, and choosing the right one is essential. Make sure your handle matches your stat allocation.

  • Understand the Weapon's Attack Cycle: Does the weapon swing quickly? Is it a large, slow attack? These factors also affect how much you’ll enjoy using a particular weapon. Don’t just focus on the numbers—make sure the weapon's attack style suits your gameplay.

For example, if you’ve invested heavily in Determination, you might opt for a large, heavy blade with a handle that boosts Resolve. This setup will maximize damage and allow you to deal significant blows, even though your attack speed might be slower. On the other hand, if you prefer speed, you may want to look for a handle that works with Technique, offering faster swings but lower damage per hit.

Weapon Handles and Their Impact on Combat

The handle also determines the attack cycle of your weapon. Some handles give you quicker, more agile strikes, while others offer slower, more powerful hits. This is why it’s so important to match your handle with your character’s stats and abilities.

For instance, if you have a Technique-based build, you’ll want a handle that provides faster swings and better maneuverability. But if you’re focusing on Determination, your handle should allow for slower, heavier attacks that can deal substantial damage. The key is not just picking the blade, but also ensuring that the attack cycle fits your desired playstyle.


Balancing Stamina and Attack Speed

When using heavy weapons, stamina management is key. The larger your weapon, the more stamina you’ll consume with each attack. This is why players with Determination builds often invest in amulets or gear that increase stamina regeneration or carry capacity. Without proper stamina management, you might find yourself too slow to keep up with enemies, especially during longer battles.

To help manage this, it’s a good idea to use an amulet that restores stamina quickly after each swing. This ensures you can keep attacking without worrying too much about running out of stamina in the middle of a fight. Additionally, look for amulets that increase your weight capacity, allowing you to carry heavier blades without sacrificing speed.

Optimizing Your Gear: The Right Amulets

For players focusing on Determination, equipping the right amulets can give you a significant advantage in combat. Here are some tips:

  • Increase Weight Capacity: Choose an amulet that boosts your weight capacity so you can carry larger weapons without being slowed down.

  • Boost Determination: Amulets that increase your Determination stat can further enhance your weapon’s damage output, ensuring that your heavy weapon is as effective as possible.

  • Stamina Restoration: Heavier weapons can drain your stamina quickly, so it’s crucial to use amulets that restore stamina rapidly. This will help you stay on top of your game, especially during extended combat sequences.

Fine-Tuning Your Build

Once you’ve chosen your weapon and amulets, it’s time to fine-tune your build. Start by checking which stats you’ve invested in. If you’ve focused heavily on Determination, continue to prioritize weight capacity and stamina. If your focus is on Technique, consider investing in equipment that boosts your mobility and attack speed.

Delving Deeper into Weapon Types

In Lies of P, there is no shortage of weapon types, and each one is crafted to suit different playstyles. Let’s take a look at how each type of weapon correlates with your build and how you can maximize their potential.

Heavy Weapons for Determination Builds

When you invest in Determination, you’re gearing up for heavy weapons that hit hard but move slow. This type of weapon demands a higher weight capacity and stamina management to perform effectively. The larger the weapon, the slower your attacks become, but the damage output increases drastically.

  • Greatswords: A popular choice for Determination builds, greatswords deal significant damage with each swing. However, their speed is considerably slower compared to smaller blades, so stamina consumption becomes a key factor in maintaining effectiveness.

  • Hammers: These are a great alternative if you want to deal massive stagger damage and break enemy defenses. Hammers can crush shields and armor, making them an excellent choice against tankier foes. Be sure to complement them with stamina-restoring amulets to maintain a steady flow in battle.

  • Axes and Maces: Slightly faster than hammers and greatswords, axes and maces still deliver powerful blows. They are a bit more versatile, providing you with some speed without compromising too much on damage.

These weapons are effective in a Determination build, but keep in mind that your stamina will deplete quickly if you are not managing it well. Strategically placing points in stamina and weight capacity is essential for maximizing these weapons' potential.

Light Weapons for Technique Builds

On the other end of the spectrum, Technique builds focus on light weapons that provide speed and agility. These weapons allow for rapid strikes, letting you dish out damage without worrying too much about stamina usage.

  • Daggers and Swords: The fastest of the bunch, these weapons allow for quick, successive hits, making them ideal for evasion-heavy, reactive players. If you’re aiming to hit fast and dodge fast, daggers and swords should be your weapon of choice.

  • Katanas: Offering a nice balance between speed and damage, katanas give you the best of both worlds. While not as quick as daggers, they offer more range and a bit more damage.

  • Spears: Although not as common, spears provide a reach advantage in combat. Their attacks tend to be faster than most heavy weapons, but their range is a great asset for controlling the battlefield.

Light weapons are all about mobility and speed, so they’re ideal for players who enjoy fast-paced, evasive playstyles. You’ll need to prioritize dexterity and speed-focused amulets to enhance your performance.


Midweight Weapons for Progress Builds

If you want to mix things up and find a balance between speed and defense, Progress builds are where you’ll likely find midweight weapons, such as short swords, long swords, or flails. These weapons offer a moderate damage output while also giving you the opportunity to handle defenses more effectively.

Progress weapons are ideal for players who prefer versatility and adaptability in combat. They’re effective for those who might need to react to a variety of enemies, as they provide a mix of offense and defense.

Maximizing Your Weapon’s Performance: Stat Synergy

One of the most important things to understand about weapon optimization is the synergy between your weapon, stats, and chosen gear. Each weapon in Lies of P scales differently with various stats, so understanding which stats to prioritize based on your weapon choice is vital for maximizing your weapon’s performance.

Scaling with Determination

Weapons scaled with Determination require significant investment in Strength and Vitality to handle their size and weight. Heavy weapons are slow and will require you to build stamina and weight capacity to avoid being overwhelmed by encumbrance. However, once you have the necessary stats in place, the payoff is huge. These weapons have the potential to deal the highest damage per hit, especially when used with resolve-based handles.

  • Maximizing Weapon Damage: If you’re using heavy weapons, ensure that you’re investing in stats like Vitality and Strength to carry and wield them effectively. Upgrading your weight capacity is also crucial for maintaining agility while wielding large weapons.

  • Weapon Handles for Resolve: As mentioned earlier, the weapon handle plays a massive role in scaling with your Determination build. Handles that boost resolve will help you increase your weapon’s damage scaling. Always pair your weapon with a handle that complements your stat investment.

Scaling with Technique

For those focusing on Technique, the goal is to increase attack speed while maintaining a solid output of damage. Speed and light weapon choices are the best way to go here, and you’ll want to prioritize agility, stamina regeneration, and dexterity.

  • Light Weapons for Speed: These will naturally scale with Technique and give you the ability to land multiple hits in quick succession. You’ll want to focus on the handle’s scaling with Technique to ensure you’re getting the most out of your weapon’s light and agile nature.

  • Balancing Speed and Damage: While Technique builds tend to sacrifice raw damage for speed, it’s important to find the right balance of speed and power. Katanas, daggers, and short swords are great choices here. These weapons scale well with Technique, giving you quick and nimble strikes without overly compromising your damage.

Scaling with Progress

If you’ve invested in Progress, you’ll want weapons that strike a balance between damage and defense. These weapons tend to be lighter than heavy weapons but still hit hard, and they require a focus on dexterity, stamina, and defensive stats to function optimally.

  • Versatile Midweight Weapons: These are ideal for players who enjoy a well-rounded combat approach. Weapons like long swords and maces allow for fast attacks without sacrificing too much power.

  • Handles for Balanced Builds: When scaling with Progress, ensure that you’re using handles that support defensive as well as offensive abilities. This will ensure that your weapon is versatile, adapting well to both fast and defensive playstyles.


Managing Stamina: The Key to Sustainable Combat

When using heavier weapons, one of the biggest challenges is managing your stamina. Each swing consumes stamina, and if you’re not careful, you can run out mid-combat, leaving you vulnerable to attacks.

  • Stamina Management with Amulets: You’ll want to equip amulets that regenerate stamina quickly to keep your momentum going. Having a high stamina regeneration rate can help you stay agile even when wielding heavy weapons.

  • Light Weapons for Less Stamina Drain: If you’re worried about stamina management, light weapons are a good option. They tend to consume less stamina, allowing for more consistent attacking without risking a stamina depletion.

Final Weapon Customization Tips

  • Don’t Just Pick the Highest Damage Weapon: While it’s tempting to go for the weapon with the highest damage output, make sure it fits your build. If it’s too heavy and you don’t have enough weight capacity or stamina, it’ll slow you down. Balance is the key to success.

  • Upgrade Your Weapon Handle: Once you’ve selected a handle that scales well with your stats, be sure to upgrade it to the highest possible level for maximum damage output. You can always adjust the weapon’s scaling based on your playstyle, but the handle determines how the weapon behaves in combat.


Conclusion: Tailoring Your Weapon to Your Build

Choosing the best weapon for your build in Lies of P is all about understanding the relationship between your stats, weapon choice, and handle. Whether you’re aiming for Determination, Technique, or Progress, each stat offers a distinct advantage in combat. By carefully selecting the right weapon handle, weapon type, and gear, you can create a build that maximizes your potential in battle.

Remember, it's not just about picking the highest-damage weapon—it’s about ensuring that your weapon complements your character’s build, allowing you to wield it effectively and efficiently. Make sure your weapon's scaling fits your stats, and don't forget to balance stamina, weight, and defense to create a well-rounded, powerful character.

With these tips in hand, you're ready to optimize your weapon build for the toughest battles in Lies of P. Good luck, and may your swings be powerful!


FAQ

Q: What is the best weapon for a Determination build?
A: For a Determination build, heavy weapons like greatswords, hammers, or axes are ideal. They deal high damage but require good stamina management and weight capacity.

Q: How do I optimize my weapon scaling in Lies of P?
A: Focus on choosing weapon handles that match your chosen stat (Determination, Technique, or Progress). Upgrade the handle to enhance scaling and ensure the weapon aligns with your build.

Q: Can I use light weapons for a Determination build?
A: Light weapons are not optimal for Determination builds. They are better suited for Technique builds, which prioritize speed and agility. For Determination, choose heavier, slower weapons for maximum damage.

Q: What role do amulets play in my weapon choice?
A: Amulets can boost stamina regeneration, weight capacity, and stat scaling. For a Determination build, amulets that increase stamina or strength can help sustain your heavy weapon usage.

Q: How can I manage stamina when using heavy weapons?
A: Heavy weapons consume more stamina, so equip amulets that restore stamina quickly. You can also focus on increasing stamina regeneration to keep up with high stamina usage.

Q: Why is the weapon handle so important?
A: The handle determines the weapon’s scaling and attack cycle. It must align with your character’s stat focus to maximize your damage output and make sure the weapon suits your build’s playstyle.


Stay Connected with Haplo Gaming Chef

Haplo Gaming Chef blends gaming guides with casual cooking streams for a truly unique viewer experience. Whether you’re here for clean, no-nonsense walkthroughs or just want to chill with some cozy cooking content between game sessions, this is the place for you. From full game unlock guides to live recipe prep and casual chats, Haplo Gaming Chef delivers content that’s both informative and enjoyable.

You Can Follow Along On Every Major Platform:

YouTubeTwitchTikTokInstagramTwitter/XThreadsBlueskyPinterestFlipboardFacebookLinkedInTumblrMediumBlogger, and even on Google Business.

No filler, no fluff—just straight-up help for gamers and fun for foodies. Join the community today!
For More Guides Visit: Haplo Gaming Chef Website!

Share:

Lies of P: Quick and Easy Ergo Farming Method to Boost Your Progress


If you're looking to farm Ergo quickly in Lies of P and level up fast, you're in the right place. In this guide, I'll show you a super-efficient spot to farm around 1,000 Ergo in less than 30 seconds, depending on how strong your character is. Not only will you be racking up plenty of Ergo, but you’ll also collect some valuable items along the way, which you can sell to boost your resources further.

Why This Farming Spot Works

The best part? You don't need to waste time traveling too far. There's a specific area where strong enemies are packed close together, making it perfect for farming Ergo without having to spend hours grinding.

Where to Find This Ergo Farm Spot

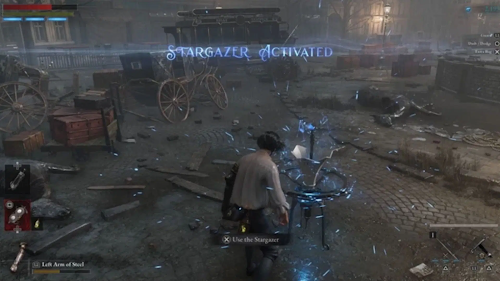
This farming spot is located in the Malm District during Chapter 5 of the game, which you can reach by using the Stargazer teleport point nearby. If you've been playing for a while, you might already recognize the location – it's a central area filled with high-yield enemies that drop a lot of Ergo and items. The best part? The enemies are right next to a Stargazer, making it super easy to reset and repeat the process as needed.

Once you’re at the Stargazer, head straight into the Huma House. This area is home to powerful enemies, including a large boss-type that rewards you with a few hundred Ergo upon defeat. You'll also find smaller enemies that add up to your total, bringing your Ergo haul to about 1,000 within seconds if you’re quick.


Maximizing Your Farming Efficiency

The amount of Ergo you can farm here will depend on your strength and speed. The stronger your character, the faster you’ll clear the area. As you progress through the game and level up your character, this farming spot becomes even more effective, allowing you to gather resources in a fraction of the time.

If you're struggling with any other parts of the game or can't seem to beat a boss, this is a great way to farm some extra resources to get back on track. Plus, farming here can help you level up quickly, so you’re always ready for tougher challenges down the road.

What to Expect from This Farm Spot

Aside from the 1,000 Ergo, you’ll also find various items scattered throughout the area. These items can be sold to merchants for more Ergo or used to upgrade your gear. So, not only will you be gathering Ergo for leveling, but you'll also be improving your overall loadout, making future fights much easier.

Another benefit of this spot is that it’s a reliable source of Ergo and items. You don’t have to worry about losing your progress – just keep farming, and your stockpile of Ergo will continue to grow.

How to Prepare for Farming Ergo

Before you begin, there are a few things you can do to make your farming even more effective:

  1. Upgrade Your Skills: If you've unlocked the skill that increases the amount of Ergo dropped by enemies, it’s a great idea to level it up before farming. This will ensure you get as much Ergo as possible with each kill.

  2. Level Up Your Character: The stronger you are, the faster you can clear the enemies. Focus on leveling up your character, especially increasing your damage output and survivability. This will help you farm Ergo quickly without taking too much damage.

  3. Bring Healing Items: Although the enemies here aren't overwhelmingly tough, it's always a good idea to come prepared. Bring healing items to make sure you don’t run into trouble.

How to Keep Farming Efficiently

Once you’ve cleared the enemies and gathered all the loot, simply return to the Stargazer, reset the area, and go again. You can repeat this process as many times as you like to farm Ergo, level up, and collect items without breaking a sweat.

However, be cautious not to overfarm. If you farm too much, your character might become too powerful, and the game’s difficulty will feel too easy. It’s always good to keep a balance so the game remains challenging and fun. But if you're just looking to level up once or twice, or gather some essential items, this spot is perfect for those needs.


The Importance of Ergo for Progression

In Lies of P, Ergo is more than just a form of in-game currency. It’s vital for leveling up your character, upgrading your weapons, and purchasing items from merchants. As you progress, you'll encounter stronger enemies and tougher bosses, and having a good stockpile of Ergo ensures that you’ll always have the resources to keep upgrading and improving.

In this game, some of the best upgrades—whether it’s armor, amulets, or weapons—require a hefty amount of Ergo. That’s why farming it efficiently early on can make a huge difference in how well you perform later in the game. This spot allows you to quickly accumulate Ergo and ensure you’re always ready for whatever the game throws your way.

Items You Can Sell to Boost Your Earnings

Besides the Ergo, you’ll also collect various items during your farming runs. Some of these items are useful for your own character upgrades, while others can be sold for additional Ergo. Here’s a quick rundown of what you can expect:

  • Weapons and Gear: Occasionally, you’ll find new weapons or pieces of armor dropped by enemies. These can be sold for a decent amount of Ergo if you don’t need them.

  • Crafting Materials: Some enemies drop crafting materials that can be sold to merchants for additional Ergo. Crafting materials are essential for upgrading your weapons or making health potions, so keep an eye out for them.

  • Amulets and Buff Items: These can also be sold for more Ergo. While they might be useful in battle, you can always sell any duplicates to increase your bank balance.

When to Stop Farming: Avoid Overleveling

As I mentioned before, it's important to strike a balance. While this farming spot is one of the most efficient in the game, it’s also easy to overdo it. Farming for too long can lead to overleveling your character, which can make the game feel too easy. It’s essential to keep the game challenging, so use this farming method to help you level up a few times or gather a couple of essential items, but don’t make it your sole focus.

If you ever feel like the game is getting too easy, consider moving on to the next part of the story. Remember, the enjoyment of Lies of P comes from the challenge, so be mindful of how much you farm.

Why This Spot Works So Well

Now, you might be wondering why this specific spot is so effective for farming. The answer lies in the concentration of enemies in a small area. The enemies here spawn quickly, and there’s a lot of them. This means you can get a large amount of Ergo and items in a short amount of time. Plus, the close proximity to the Stargazer makes it convenient to reset the area without having to run across the map.

What also makes this spot ideal is that the enemies are diverse. You’ll encounter both large, boss-like enemies that give you a big Ergo reward and smaller enemies that still contribute a fair amount of drops. This variety keeps things interesting while still giving you an excellent return on your time investment.


Farming Strategy: Maximize Your Ergo Gains

To make the most of this farm spot, you need a solid strategy. Here’s a breakdown of what you can do to maximize your Ergo farming:

  1. Speed is Key: The faster you clear the enemies, the more Ergo you’ll earn in a short period of time. Focus on speed while still ensuring you don’t take too much damage.

  2. Take Advantage of the Reset Mechanic: Once you’ve cleared the enemies, head back to the Stargazer to reset the area and repeat the process. The more you do this, the more Ergo you’ll farm.

  3. Use Buffs and Consumables: If you have items that can increase your damage or speed up your farming, use them. A small boost in your effectiveness can make a big difference over time.

  4. Strategically Sell Items: While you’re farming, collect any valuable items and sell them to the nearest merchant. This will help keep your Ergo count high, ensuring you can purchase whatever upgrades you need.

Is This Spot the Best Early Farm Location?

For the early stages of the game, this spot is one of the best for Ergo farming. While there are other areas in the game that offer decent rewards, the combination of fast enemy spawns, a high concentration of enemies, and a nearby Stargazer make this location particularly effective.

However, as you progress and unlock new areas, you might find that other spots become more lucrative for farming Ergo. But for beginners or those looking to power-level during Chapter 5, this location remains one of the best.

Tips for New Players

If you’re just starting out in Lies of P, here are some additional tips that will make your farming even more efficient:

  • Upgrade Your Weapon Early: The faster you can defeat enemies, the more Ergo you’ll farm. Make sure you’re using the best weapon available to you.

  • Don’t Neglect Armor: If you're constantly taking damage, you won't be able to farm effectively. Make sure you have decent armor to survive tougher fights.

  • Explore Before Farming: Take some time to explore the area. There are plenty of hidden items and resources that can make your farming runs even more productive.


Conclusion: A Quick, Easy Way to Farm Ergo and Progress Faster

In summary, if you’re looking for a fast and efficient way to farm Ergo in Lies of P, this spot in the Malm District is your best bet. By focusing on clearing enemies quickly, resetting the area, and collecting valuable items, you can earn 1,000 Ergo in about 30 seconds, giving you a significant advantage as you progress through the game.

Remember, while this spot is incredibly useful for farming, it’s important not to overdo it. Keep the game challenging by using this spot for leveling up or collecting essential items, but don’t let it become the main focus of your playthrough. Use this guide to boost your progress, and you’ll be well on your way to conquering the challenges that Lies of P has to offer.

FAQ:

1. What is the best way to farm Ergo in Lies of P?
The best way to farm Ergo quickly is to head to the Malm District during Chapter 5. There’s a spot near the Stargazer where you can clear enemies for a fast 1,000 Ergo in around 30 seconds.

2. Can I farm Ergo endlessly at this spot?
Yes, you can reset the area by returning to the Stargazer and farming again. However, don’t overdo it, or you may outlevel the game’s challenges.

3. What enemies should I focus on for farming?
Focus on the large boss-like enemies for the biggest Ergo rewards. There are also smaller enemies around that contribute to your total haul.

4. Do I need to level up skills before farming?
It’s recommended to level up the skill that increases Ergo drops from enemies. This will boost your overall farming efficiency and help you gather more resources.

5. How can I use the items I collect while farming?
You can sell unwanted items and gear to merchants for extra Ergo or use crafting materials to upgrade your weapons, armor, or create healing items.

6. Is this farming method only for early game?
While it’s ideal for early farming, this spot remains useful as you progress. You can always come back for quick Ergo and item farming.


Stay Connected with Haplo Gaming Chef

Haplo Gaming Chef blends gaming guides with casual cooking streams for a truly unique viewer experience. Whether you’re here for clean, no-nonsense walkthroughs or just want to chill with some cozy cooking content between game sessions, this is the place for you. From full game unlock guides to live recipe prep and casual chats, Haplo Gaming Chef delivers content that’s both informative and enjoyable.

You Can Follow Along On Every Major Platform:

YouTubeTwitchTikTokInstagramTwitter/XThreadsBlueskyPinterestFlipboardFacebookLinkedInTumblrMediumBlogger, and even on Google Business.

No filler, no fluff—just straight-up help for gamers and fun for foodies. Join the community today!
For More Guides Visit: Haplo Gaming Chef Website!

Share:

Lies of P: How to Defeat King of Puppets with Determination Build (No Specter)


Determination Build Guide: Defeating the King of Puppets (No Specter)

Welcome to another Lies of P guide, friends! Today, we’re diving into one of the more challenging bosses in the game: The King of Puppets, or the Puppeteer. If you’ve been struggling or simply want to take down this formidable foe without relying on spirits or throwing items, this is the guide for you. We’ll be tackling this fight with the Determination Build, so you’ll be hitting hard and dealing tons of damage while keeping things straightforward.

In this guide, I’ll walk you through exactly how I managed to defeat the King of Puppets, providing details on the gear and strategy I used. The goal is to help you get through this battle with ease, even if you're not using all the fancy items or spirits that some players rely on.


Equipment Overview

Before jumping into the battle, let’s go over the equipment I used to get through this boss fight:

Weapon: Bone Cutter Saw Blade +5

  • The Bone Cutter Saw Blade (upgraded to +5) is my weapon of choice for this battle. It provides solid damage output and decent range. If you want to further increase your chances, you can always upgrade it to +6 or higher.

Handle: Exploding Pickaxe

  • The Exploding Pickaxe handle is important for the Determination build, as it gives an A-rank boost to Determination. This significantly increases your damage output and ensures you’ll be dealing plenty of hits.

Amulet: Patience Amulet

  • The Patience Amulet helps by boosting stamina regeneration, increasing damage against puppets, and improving your carry weight. With this amulet, you can carry heavier gear without being slowed down, which is essential for surviving longer fights.

Heavyweight Frame

  • For extra defense, the Heavyweight Frame reduces damage and helps keep you in the fight for longer. Its ability to mitigate damage is crucial for staying in the fight, especially during the later stages.

Belffort Superior

  • The Belffort Superior provides a significant punch. It’s useful for both offensive and defensive capabilities, allowing you to deal strong hits while also reducing damage from attacks.

35 Feeding Unit

  • This unit is lightweight but still offers a decent amount of protection, ensuring that you have mobility and defense.

Pandemonium Plug

  • Finally, the Pandemonium Plug is an excellent addition. It’s especially helpful for poisoning the King of Puppets, particularly in the first phase of the fight, when the boss remains relatively stationary. Poisoning him early will help weaken him as you move through the fight.


Boss Fight Strategy: First Phase

Now, let’s get into the actual fight. In this first phase, you’ll be focusing on dealing damage while carefully dodging the King of Puppets’ attacks.

  1. Set Up Poison Early

    • As soon as the fight begins, drop the Pandemonium Plug to poison the King of Puppets. The poison will do continuous damage, which is crucial for wearing down the boss, especially when he’s stationary during the first phase.

  2. Dodge His Spin Attacks

    • The King of Puppets’ spin attack consists of two hits, so be sure to dodge to the side when he starts spinning. You’ll want to avoid getting hit by both strikes, as they can deal significant damage if you're not careful.

  3. Use Your Weapon for Maximum Damage

    • After dodging, immediately go in and land a couple of hits with your Bone Cutter Saw Blade. This weapon’s decent range will allow you to attack from a safe distance, and the Determination Build will help you hit hard.

  4. Watch for the Double Strike

    • Whenever the King of Puppets starts his combo, you can anticipate him striking twice. After dodging the first hit, you can counter with two or three quick strikes of your own before backing off.

  5. Sharpen Your Weapon

    • Before entering the second phase, make sure to sharpen your weapon. This is crucial, as you’ll need to maintain high damage output throughout the entire fight. I didn’t do this perfectly on my first attempt, but I still managed to succeed.


Boss Fight Strategy: Second Phase

Now that you’re through the first phase, you’ll enter the second phase, which can seem daunting at first but is actually quite manageable once you know what to expect.

  1. Dodge His Jump Attack

    • The King of Puppets will often use a jumping attack, and this is your chance to strike. When he jumps, dodge his attack and land two solid hits on him. Afterward, back off and wait for his next move.

  2. Watch for the Fire Attack

    • When you see the King of Puppets start charging up his sword, be ready. This is when he’ll use his flaming attack, which can drain all your health if you don’t interrupt it. Get in two hits before the flames activate to interrupt the attack and avoid getting hit.

  3. Be Mindful of His Special Attacks

    • The King of Puppets’ special attack (the one where he charges up flames or a large combo) requires careful timing. Once you see him charge, step in and land two quick hits to interrupt him. Don’t let him complete the attack, as it’s a game-changer if you miss it.

  4. Keep Your Distance

    • When he’s not using his jump or double strike combo, make sure to keep your distance. Don’t get greedy with your attacks—only go in when you’re certain you can land two solid strikes without taking damage in return.

  5. Repeat the Process

    • Continue dodging and landing your hits, especially during his jump attack or double strike combo. These are your windows of opportunity to deal damage safely. With enough patience and precise timing, the King of Puppets will soon be defeated.


Key Tips for Success

  • Poison Early: Dropping the Pandemonium Plug early is crucial. It helps soften up the boss and gives you extra time to focus on dodging and attacking.

  • Weapon Sharpening: Keep your weapon sharp. A dull weapon can significantly reduce your damage output, which is especially important when you’re relying on a Determination Build.

  • Patience is Key: Don’t rush in during the second phase. Focus on dodging and landing a few solid hits at a time.

  • Interrupt His Special Attack: Pay attention to his special fire attack. Get in two quick hits to stop it before it drains your health.


Additional Tips for the King of Puppets Fight

While the first and second phases of the fight may seem straightforward, a few additional techniques and strategies will give you an edge, especially as you face off against the King of Puppets without the use of spirits. Here’s how to fine-tune your approach:


Optimize Your Build for the King of Puppets

The Determination Build is all about maximizing your damage while being efficient with your stamina usage. Below are some additional tips to fine-tune your build for success against the King of Puppets:

Maximize Your Damage Output

  • Focus on High-Damage Weapons: Since you’re using a weapon like the Bone Cutter Saw Blade +5, you’ll be relying on the weapon’s damage stats. It’s a good idea to upgrade your weapon as much as possible before this fight. Even a +6 or +7 upgrade can make a significant difference in your overall damage output.

  • Boost Your Determination Stat: The Determination Build heavily relies on enhancing your Determination stat, which will increase your damage when your stamina is high. Make sure to equip gear or amulets that specifically enhance this stat (like the Exploding Pickaxe Handle with A-ranked Determination). You’ll notice a noticeable difference in damage as a result.

Stamina Management

  • Use Amulets and Frames to Increase Stamina: The Patience Amulet is one of the best choices for improving your stamina regeneration, ensuring that you’re not running low on stamina too quickly. Having a solid stamina pool is crucial for maintaining damage output while dodging and blocking attacks.

  • Keep a Sharp Eye on Stamina Levels: When you’re in the middle of the fight, it’s easy to get carried away with attacking. But, be sure to watch your stamina bar carefully. Running out of stamina mid-fight can lead to disastrous results. With the Patience Amulet and other gear to boost stamina, you’ll be able to fight for longer periods without worrying about getting exhausted.


Phase One: Handling the Puppeteer’s Moves with Precision

Understanding His Movements

The King of Puppets has a range of attacks in his arsenal, but the key to surviving the first phase is understanding when to dodge and when to strike. Here’s a more detailed breakdown of his key moves and how to counter them:

  1. The Spin Attack:

    • The King of Puppets uses a spin attack that strikes twice. The trick is to dodge after the first hit, as this will give you enough time to step in and land two hits of your own. You can even get a third hit in if you're quick enough, but be cautious about his follow-up moves. Once he completes the spin, he’ll often try a second spin, so stay aware.

  2. Jump Attack:

    • The jumping attack is a classic move that he will frequently use in both phases. When you see him leap into the air, dodge sideways. This will help you avoid getting hit by his attack, and after you dodge, you can quickly land two hits. The window is small, but the attack is predictable once you get used to it.

  3. Double Strike Combo:

    • The King of Puppets will often start with a double strike combo. The trick here is to dodge the first strike and immediately go in for two or three quick hits before backing off. If you miss the first window of opportunity, you’ll have to wait for him to reset and perform another move before you can get back into attacking.


Phase Two: Handling the King’s Fire and Special Attacks

The second phase of the King of Puppets is often where players struggle, thinking that this phase is harder. In reality, the second phase is easier once you understand the patterns and the importance of interrupting his fire attack. Here's what you need to watch for:

Fire Charge Up:

  • The King of Puppets has a devastating fire attack where he charges up his sword. If you don’t interrupt this, he’ll unleash flames that can wipe out a significant chunk of your health bar.

    • Interrupting the Fire Attack: As soon as you see him charge up the fire, it’s your chance to quickly move in and land two hits. This will stop the attack from going off and save you from the fiery devastation. This is crucial, as failing to interrupt it could lead to a tough recovery.

Jumping Attack Revisited:

  • The jumping attack in phase two behaves similarly to the first phase, but he becomes a bit more aggressive with his follow-ups. Remember, the best strategy is to dodge the attack and immediately counter with two hits. When performed correctly, this gives you a consistent rhythm and damage cycle.

Sword Charge Attack:

  • If you see the King of Puppets charging up his sword, be sure to dodge and land two quick hits to break his charge. This is another opportunity to interrupt his most dangerous attack, preventing him from draining your health.

Staying Close and Avoiding His Spin:

  • When the King of Puppets begins his spin attacks in the second phase, get closer to him to avoid the outer edges of his strikes. When you stay close, you’re in a better position to dodge and land your own hits while avoiding damage.


A Few Additional Recommendations

Keep Potions Ready, But Don’t Overuse Them

While it’s great to save your healing potions, you want to be prepared for any surprises. Although I didn’t use any potions in my fight, it’s a good idea to carry at least 2-3 healing items just in case things go wrong. The King of Puppets has a lot of ways to throw you off, and having an extra health potion might be the difference between winning and losing.

Don’t Rush the Fight

The key to defeating the King of Puppets is patience. Don’t get greedy with your attacks—take your time to dodge, wait for the right openings, and only land a couple of strikes at a time. This will not only keep you safer but also ensure you’re dealing consistent damage throughout the fight. Rushing the battle will only lead to mistakes.


Why the Determination Build Works

At the heart of this strategy is the Determination Build, which plays a pivotal role in making this fight more manageable. The A-Rank Determination boost from the Exploding Pickaxe Handle makes your hits devastatingly strong when your stamina is high. This allows you to dish out consistent damage without getting overly tired or having to rely on constant healing.

  • High Damage Output: With the Determination stat scaling, every hit becomes more impactful, which is essential for taking down the King of Puppets before he can deal too much damage.

  • Sustainability: Thanks to the Patience Amulet, you won’t run out of stamina quickly, allowing you to stay in the fight longer without exhausting your resources.


In Summary

Defeating the King of Puppets with the Determination Build in Lies of P is completely achievable. By leveraging the right equipment, carefully dodging attacks, and timing your own strikes, you can make the fight feel more manageable. Focus on getting two hits during the jump attack or double strike combo, and always watch out for his fire attack to interrupt it before it wipes you out. With some patience and strategy, you'll take down this puppet master in no time.


Conclusion

Defeating the King of Puppets in Lies of P with the Determination Build is a satisfying and rewarding challenge. By focusing on high damage output, managing stamina efficiently, and learning his attack patterns, you can conquer this boss without relying on spirits or items. With the right gear and strategy, the King of Puppets will fall before you, and you’ll come out of the fight victorious, without losing much health or relying heavily on potions. Remember to stay patient, dodge effectively, and always watch for his key attack cues, especially the fire charge-up, which is essential to interrupt. Good luck, and enjoy the fight!


FAQ

Q1: What’s the best weapon for a Determination Build?
A: The Bone Cutter Saw Blade +5 is excellent for high damage output. You can upgrade it further for even better results.

Q2: How do I maximize stamina during the fight?
A: Equip the Patience Amulet and other gear that boosts stamina regeneration. This allows you to keep attacking without running out of energy.

Q3: How do I interrupt the King of Puppets’ fire attack?
A: When he charges up for the fire attack, quickly land two hits to interrupt it before he releases the flames.

Q4: Can I defeat the King of Puppets without using potions?
A: Yes! If you manage to dodge well and time your attacks properly, you can defeat him without using any potions.

Q5: Is the second phase harder than the first?
A: No, the second phase is actually easier once you get the hang of dodging and interrupting his special moves, particularly his fire attack.


Stay Connected with Haplo Gaming Chef

Haplo Gaming Chef blends gaming guides with casual cooking streams for a truly unique viewer experience. Whether you’re here for clean, no-nonsense walkthroughs or just want to chill with some cozy cooking content between game sessions, this is the place for you. From full game unlock guides to live recipe prep and casual chats, Haplo Gaming Chef delivers content that’s both informative and enjoyable.

You Can Follow Along On Every Major Platform:

YouTubeTwitchTikTokInstagramTwitter/XThreadsBlueskyPinterestFlipboardFacebookLinkedInTumblrMediumBlogger, and even on Google Business.

No filler, no fluff—just straight-up help for gamers and fun for foodies. Join the community today!
For More Guides Visit: Haplo Gaming Chef Website!

Share:

Pageviews past week

Games

Guide Archive

Contact The Haplo Gaming Chef

Name

Email *

Message *