
Intro to the Volcanic Fissure Berserker
Starting strong in early maps with the Volcanic Fissure skill can feel overwhelming, but with a simple gear path and proper gem links, it becomes one of the most efficient PoE 3.26 starter builds. This guide walks you through an optimized approach to gearing, defenses, and progressing smoothly through the early game as a Berserker.
Initial Setup: Skill Links That Matter
Once you've acquired Volcanic Fissure, it’s time to set up your main skill. The core gem link setup should include Fist of War, Pulverise, and Overwhelming Odds. These provide excellent area coverage and solid burst.
If you have access to a 5-link, add Lifetap. For a 6-link, finish it with Melee Physical Damage. Always aim to position Volcanic Fissure behind the target to maximize the triple-hit mechanic, greatly increasing your damage potential.

Early Defense: How to Stop Dying
Many players struggle with survivability in early maps. The key is simple: stack armor and life early. Aim for around 2,000 armor or more using pieces with 400–500 base armor, and invest in gear with +100 life wherever possible—belts, boots, gloves, rings, and amulets should all contribute.
Fire resistance is critical too—consider equipping items like Kaom’s Primacy and fire-resistance boots early to smooth your red map transition.
The Gear You Need (Without Breaking the Bank)
You don’t need expensive gear to get started. Most of the items you’ll need can be obtained through campaign progression, quest rewards, or cheap trades. Start with campaign drops and enhance with target-farming or simple gear crafting using essences and bench mods.
Only two purchases should be prioritized: Volcanic Fissure and Kaom’s Primacy. These will carry you far, even with just 3.9k life.
Boosting Physical Damage Reduction
A common concern is how to stack physical damage reduction effectively. Even without endurance charges, 40–50% reduction is possible with the right armor values. With endurance charges active, expect 80–90% physical damage mitigation.
Utilize passives and flasks that improve armor and endurance generation to help with consistent uptime.
Reliable Armor Pieces to Look For
-
Helmets: Look for life, resistances, and armor.
-
Chest pieces: Prioritize high armor rating, optionally skip life mods if using Life Mastery.
-
Gloves and boots: Look for increased attack speed, life, and resistances.
-
Belts: The Belt of the Deceiver offers intimidation and added survivability early on.
Merc Crafting and Budget Gear from Vendors
Crafting through Merc or vendors early can yield huge value. Try gambling cheap fissure-based armors for a chance at 5–6-links. Item level 81 pieces can drop before you hit red maps, giving you a serious gear advantage if lucky.
Even without perfect rolls, these crafts provide a strong baseline of armor and resistances.
Your Map Companion: Choosing the Right Merc
Two solid Merc companions are available:
-
Sniper Support: Offers Poacher's Mark, solving early mana issues and granting Frenzy Charges.
-
War Priest Support: Grants Sign of the Sin Eater, making you immune to elemental ailments—a great QoL boost.
If you’re lacking mana sustain and can’t afford leech setups, the Sniper is your best friend. If ailment immunity matters more, go with the War Priest.
Mana Sustain Options
Mana issues hit hard early on. You have three fixes:
-
Assassin’s or Poacher’s Mark linked with Merc.
-
Allocate Life and Mana Leech node via the skill tree.
-
Anoint Clever Thief on your amulet using Clear + Indigo oils for 1% attack damage leeched as life and mana.
Until your leech setup stabilizes, keep a mana leech support gem in your main link.
Weapon Priorities and Stat Rolls
Look for axes with:
-
High flat physical damage
-
Increased physical damage
-
Added fire damage
Crafting early weapons via the vendor recipe—rustic sash + weapon + whetstone—is enough to power through the campaign.
Cry Skill Automation and Optimization
Set up your auto exertion skills to streamline combat:
-
First Auto Set: Seismic Cry, Intimidating Cry, Rallying Cry.
-
Second Auto Set: Infernal Cry, Blood and Sand.
Use BAC (Berserk, Ancestral Cry) during boss fights only. This conserves rage and maximizes burst potential.
Helmet and Boots Gem Loadout
-
Helmet: Enduring Cry, Blood Rage, Frostblink.
-
Boots: Leap Slam, Faster Attacks, Herald of Purity, Cast When Damage Taken + Molten Shell.
These combinations support mobility, utility, and survivability.
Choosing the Right Chest Piece
If you can afford it, Kaom’s Heart is best-in-slot for flat life and fire damage reduction. Until then, aim for armor-focused gear with no life or strength mods if you use Life Mastery: No Life Mods on Armor.
Another good option: Replica Soul Tether or Chaper Seed for life regen and mana regen synergy with Blood Rage.
Helpful Unique Items to Target Early
Here are some solid uniques to look for:
-
Replica’s Winter Charity: Useful if you need endurance charge generation.
-
Belt of the Deceiver: Boosts early damage and survivability.
-
Shaper Seed: Provides regen and is budget-friendly.
-
Kaom’s Primacy: Core weapon choice for this build.
Your Ascendancy Order
When leveling your Berserker, follow this path:
-
Normal Lab: Crave the Slaughter
-
Cruel Lab: Rite of Ruin
-
Merc Lab: War Bringer
-
Uber Lab: Aspect of Carnage
This provides a strong mix of rage generation, attack speed, and damage scaling as you progress through maps.

Skill Tree Planning and Mastery Picks
In early mapping, the skill tree needs to focus on a few priorities:
-
Life and Armor nodes for durability
-
Melee Physical Damage nodes for scaling
-
Rage generation passives for synergy with Berserker mechanics
Important masteries to allocate:
-
Life Mastery: "Increased maximum Life if no Life modifiers on equipped Body Armour"
-
Axe Mastery: "Gain 2 Rage on Hit with Axes"
-
Rage Mastery: For max rage cap and additional Rage on kill/hit
-
Fortify Mastery: Essential for mitigation, especially when using Leap Slam or linked Fortify support
This setup keeps your character alive while maintaining strong offensive momentum.
Gearing Tips for Mid‑Game Progression
As you move into yellow and red maps, start focusing on:
-
Higher base armor ratings
-
% of Physical Damage from Hits taken as Fire
-
Attack speed on gloves
-
Flat physical and elemental damage added to attacks
Aim to replace campaign gear gradually with influenced rares or tradeable mid-tier uniques that enhance survivability and offense.
Flask Recommendations
For sustain and uptime, use:
-
Divine Life Flask (bleed removal)
-
Quicksilver Flask (movement speed)
-
Basalt Flask (armor boost)
-
Granite Flask (additional armor)
-
Silver Flask or Jade Flask (attack speed or evasion, depending on playstyle)
Include curse immunity and freeze immunity on flasks to avoid being locked down in high-tier content.
Passive Tree Adjustment for End‑Game Content
As you approach red maps and bosses, refine your passive tree:
-
Drop early pathing or mana leech nodes if not needed
-
Pick up Bloodless and Savage Instinct for better life scaling and rage generation
-
Add Disciple of the Unyielding for more endurance charge generation on kill
-
Include Veteran’s Awareness for defense if needed
These changes scale your character to compete comfortably in late-game content.

Final Gear Priorities
The endgame version of your gear should include:
-
Echoes of Creation: Excellent for bosses if you can sustain Rage and use exertions properly
-
Yoke of Suffering: Converts shock to apply on all hits for a big DPS increase
-
Rare Chest: High armor with suffixes like “% of Physical Damage taken as Fire”
-
Rare Gloves: Attack speed, resistances, and physical damage to attacks
Weapons and accessories should now prioritize damage conversion, flat elemental damage, and high attack speed.
Handling Boss Fights
Use the following setup against bosses:
-
Berserk for burst
-
Warcries for exertion stacking
-
Punishment curse for increasing physical damage taken by bosses
Maintain uptime on Endurance Charges and keep Molten Shell active for added survivability.
Managing Reservation and Auras
If you're struggling with mana reservation:
-
Remove Blood and Sand until you’ve unlocked more reservation efficiency
-
Use Herald of Purity for damage and support from minions
-
Eventually, add Purity of Lightning for resistance balancing and synergy with Kaom’s gear
Check your mana usage constantly—adjust gem links if too many skills are active simultaneously.
Tips on Leveling Efficiently
While leveling through the campaign:
-
Stick with Volcanic Fissure the moment it's available
-
Use a 3 or 4-link setup early, adding more supports as gear improves
-
Prioritize passive points toward life, physical damage, and rage support nodes
-
Use Leap Slam as your main mobility skill from Act 2 onward
Replace flasks and gear regularly based on drops—no need to overinvest before maps.
Jewels and Anointments
Important options to consider:
-
Anoint: Clever Thief (via Clear and Indigo oils) early for mana sustain
-
Later Anoint: Tribal Fury or Disciple of the Slaughter for AoE and damage
-
Abyss Jewels: Look for flat physical damage, life, and attack speed
For large cluster jewels later, prioritize bonuses like Deep Cuts or Master of Fire.
Mapping Strategy: Red Map Prep
Before entering red maps:
-
Cap all elemental resistances (75% or higher)
-
Push life to at least 4,000+
-
Reach 80–90% Physical Damage Reduction with flasks and armor
Test survivability in tier 9–10 maps before pushing further. Upgrade weak slots first—especially belts and helmets.
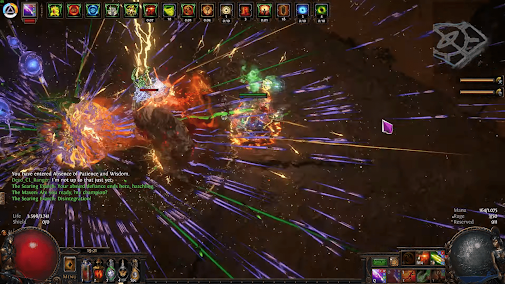
Volcanic Fissure Positioning Tips
Volcanic Fissure does more damage when placed behind enemies. Use this to triple-hit targets, especially bosses and rare mobs.
Practice in lower-tier maps to master the cast angles. Avoid casting directly on the enemy unless unavoidable.
When to Upgrade Weapon and Armor
Upgrade your weapon:
-
When flat physical damage starts to fall behind
-
When attack speed or damage rolls are too low
Upgrade your armor:
-
When survivability dips below 4k life
-
When elemental or chaos resistance caps are not met
-
When entering tier 11+ maps or facing bosses with strong elemental damage
Avoiding Common Mistakes
-
Don’t over-cap resistances and ignore life rolls
-
Don’t skip Warcries—they add significant damage and defense
-
Don’t rely solely on one type of defense (e.g., only armor)
-
Don’t run low reservation builds without compensation (e.g., Clever Thief)
Stay balanced in your defense and offense scaling.
Preparing for Uber Bosses and Late Game
As you approach pinnacle bosses:
-
Use Endurance Charge on Hit setups
-
Prioritize Echoes of Creation and Seismic Cry for burst combos
-
Consider gear with ailment immunity or setup Sign of the Sin Eater
-
Maintain Frenzy charges via Poacher's Mark or Sniper Support Mac
Plan your flask usage to cover bleed, curse, and freeze as a priority.

What Comes After the Red Maps
After completing your Atlas up to red maps:
-
Optimize your passive tree
-
Begin buying upgrades: flasks, jewels, and influenced rares
-
Begin testing advanced builds or iterations like Rage Vortex, Heavy Strike, or Tectonic Slam if you want to experiment
This is also when you can start looking into alternate ascendancies or min-maxing atlas strategies.
Conclusion
The Volcanic Fissure Berserker offers a powerful yet accessible route for Path of Exile 3.26 players aiming to dominate early maps. With its high physical damage output, effective exertion-based scaling, and straightforward gearing, this build handles campaign content and red-tier maps without requiring high investment. By carefully managing your armor, life pool, resistances, and gem links, you create a balanced character capable of clearing maps efficiently and standing up to tough bosses. Whether you're a casual player or looking for a reliable league starter, this setup provides everything needed to progress deep into the endgame.
Stay flexible with gear choices, adjust flasks as needed, and test out different Mac combinations to suit your playstyle. This build shines with solid fundamentals, allowing plenty of customization for future upgrades. If you're consistent with upkeep and planning, your Berserker will thrive well into late-tier content.
FAQs
What makes Volcanic Fissure strong for early maps?
It hits multiple times, scales well with physical and fire damage, and benefits from auto-exertion setups that require minimal manual upkeep.
Do I need expensive gear to make this build work?
No. Campaign gear and a few cheap unique items like Kaom’s Primacy are enough to get started. The build is designed for low-budget efficiency.
How do I fix early mana problems?
Use Poacher’s Mark, Clever Thief, or Mana Leech support. These options help you sustain attacks without reserving too much mana.
Which Mac companion should I choose?
Use Sniper for early mana management and Frenzy charge generation. Use War Priest for ailment immunity in tougher content.
Can I play this build as a league starter?
Yes, it’s one of the best starter options in PoE 3.26. It doesn’t rely on complex gear interactions and scales well into red maps.
When should I upgrade to a 5- or 6-link?
As soon as possible. Try gambling fissure armor or using fusings on solid armor bases. 5-links can carry you until red-tier maps.
How much life and armor should I aim for?
At least 3.9k life and 2,000+ armor base early. By red maps, 4.5k+ life and 5,000–6,000 armor with flasks is ideal.
What’s the best anoint early on?
Clever Thief—offers excellent mana and life leech early and is very cheap to anoint.
Should I aim for ailment immunity?
Yes, especially in late red maps. Use Sign of the Sin Eater or gear with ailment immunity modifiers for smoother runs.
Stay Connected with Haplo Gaming Chef
Haplo Gaming Chef blends gaming guides with casual cooking streams for a truly unique viewer experience. Whether you’re here for clean, no-nonsense walkthroughs or just want to chill with some cozy cooking content between game sessions, this is the place for you. From full game unlock guides to live recipe prep and casual chats, Haplo Gaming Chef delivers content that’s both informative and enjoyable.
You Can Follow Along On Every Major Platform:
YouTube, Twitch, TikTok, Instagram, Twitter/X, Threads, Bluesky, Pinterest, Flipboard, Facebook, LinkedIn, Tumblr, Medium, Blogger, and even on Google Business.
No filler, no fluff—just straight-up help for gamers and fun for foodies. Join the community today!
For More Guides Visit: Haplo Gaming Chef Website!


No comments:
Post a Comment