
Shadow Sorcerer and Star Druid – The Perfect Pairing
In Baldur’s Gate 3, combining the Shadow Sorcerer with the Circle of the Stars Druid creates a spellcaster that’s durable, adaptable, and difficult to disrupt. This hybrid build maximizes spellcasting output while maintaining unbreakable concentration, a key factor for sustained magical dominance.
Why Start with Shadow Sorcerer
Starting as a Shadow Sorcerer gives immediate access to Constitution saving throw proficiency, essential for holding concentration spells under pressure. It also provides key early tools like Strength of the Grave, extended Darkvision, and an impressive spell pool.
Handling Stat Conflicts: Wisdom vs. Charisma
Druids cast with Wisdom, while Sorcerers use Charisma, creating a potential conflict. To manage this, optimize your gear and feat choices to ensure your core abilities don’t suffer. The build relies primarily on Charisma for offense, with Wisdom playing a support role, especially for Druid utility spells and Illithid powers.
Best Cantrips to Pick Early
At character creation, grab cantrips that scale well and offer combat utility:
-
Bone Chill (prevents healing, great in Act 2)
-
Mage Hand
-
Ray of Frost
-
Fire Bolt
Optional: Booming Blade if melee pokes are necessary early on.

Level 1 Spells for Strong Opening
Choose Shield for survivability and Magic Missile for guaranteed early-game damage. These are reliable choices for crowd control and defensive consistency during the tougher fights in early chapters.
Suggested Ability Score Spread
Start with this stat layout:
-
16 Charisma
-
16 Dexterity
-
14 Constitution
-
12 Wisdom
Dexterity can later be reduced using gear (like Dexterity gloves), reallocating those points to raise Wisdom or Intelligence as needed. Constitution remains a priority for survivability and maintaining concentration.
Level 2 MetaMagic Choices
Twin Spell is essential—it lets you cast spells like Haste on two targets. Also pick Distant Spell for range-enhancing effects, boosting the reach of spells like Hold Person or Darkness.
Utility Spells to Consider
Thunderwave and Chromatic Orb are great to round out your spell toolkit. Chromatic Orb is particularly useful with Hound of Ill Omen, as it allows you to recycle Sorcery Points effectively in combat.
Level 3: Eyes of the Dark and Darkness Combo
Unlocking Eyes of the Dark allows you to see inside magical Darkness, which your enemies cannot. Casting Darkness gives you a safety zone—ideal for defense and ambushing foes. Equip allies with blind immunity gear like:
-
Shire’s Spear of the Night
-
Seals Watch Helmet
-
Everbright Ring
Spell Options at Level 3
Add Scorching Ray for damage and Misty Step for positioning. Quickened Spell becomes available here, letting you cast as a bonus action, which is a core mechanic of this build’s combat loop.
Level 4 Spell and Feat Choices
For cantrips, Acid Splash is strong, especially when combo’d with Radiant Orbs or elemental synergy. Spell-wise, Misty Step or Hold Person remains solid. For feats:
-
War Caster: helps keep concentration
-
Alert: boosts initiative
-
Or, boost Charisma to 18 for better casting
Level 5 Power Spike
Pick a major AoE: Fireball or Lightning Bolt. Lightning Bolt generally lands on more targets and combos well with Create Water, doubling damage through surface synergy.
Add Hound of Ill Omen at Level 6
Bringing in the Hound adds disruption power. Use it to tether enemies and apply pressure on key targets. Alternatively, get Haste now if you're planning a heavy buff strategy.
Transitioning into the Star Druid
Now it’s time to multiclass. You’ll unlock the Circle of the Stars features, including:
-
Starry Form: Dragon, Archer, Chalice
-
Guiding Bolt (no slot cost)
-
Wild Shape: Dragon Form, which helps concentration by setting your fails of 9 or below to a 10
Druid Cantrips and Spell Setup
Pick Thorn Whip and Shillelagh for utility. Prepared spells should include:
-
Create or Destroy Water (boosts Lightning damage)
-
Healing Word
-
Thunderwave or Longstrider
This blend offers offensive utility and defensive value in group play.

Circle of the Stars – Focus on Dragon Form
Dragon Form is key. It ensures near-guaranteed concentration success and provides a bonus action breath weapon that deals damage in a cone. Use this frequently when you're not spending bonus actions on Quicken Spell.
Returning to Sorcerer for Spell Growth
After getting core Druid features, go back into Sorcerer to scale your spell slots. At this stage, you can add:
-
Ice Storm: Freezing terrain and crowd control without requiring concentration
-
Wall of Fire: Strong sustained damage but does use concentration, so be strategic
Level 7-8 Spell Recommendations
For level 7, Counterspell is a must—it can turn the tide of battle. At level 8, consider:
-
Confusion for enemy disruption
-
Wall of Fire if you skipped it earlier
-
Boost Charisma or take Alert again to ensure early turns
Level 9 Unlock: Cone of Cold and More
This level gives you access to Cone of Cold—a high-damage AoE spell (8d8) which synergizes beautifully with Create Water. With Sorcery Points and Quickened Spell, this can be used effectively as a follow-up nuke after setting the terrain.
Shadow Sorcerer’s Capstone Benefits
Though you miss out on Shadow Walk without mods, the core benefits are still excellent:
-
High spell DC
-
Reliable concentration
-
Strong defensive coverage through Darkness
-
Maximum spell slot usage
Late-Game Spell Loadout Tips
Mix your damage spells and support:
-
Cloudkill: Constant AoE that damages every turn
-
Hold Monster: Paralyzes almost any enemy
-
Insect Plague: Great for crowd control
-
Haste: Core to team buffing; can be twinned
-
Chain Lightning (via Marahskur Staff): High-tier damage
Essential MetaMagic Upgrades
Add Subtle Spell to bypass silence zones and cast without verbal components. Consider Careful Spell if you want more team-safe AoEs like Fireball or Insect Plague.
Optimal Early and Late Game Armor
-
Early Game: Armor of Landfall for concentration help
-
Mid-Game: Robe of the Weave or Cloak of Protection
-
Endgame: Pyroquickness Hat (extra bonus action after fire damage), Hood of the Weave (+2 spell DC), and Mage Armor scrolls to push AC up to 24
Best Gear Synergy for This Build
Key item interactions include:
-
Luminous Gloves: Debuff enemies with Radiating Orbs
-
Evasive Shoes: +1 to AC, good for frontline survivability
-
Corrugation Ring: Amplifies Radiating Orb stacks
-
Ring of Protection: Boosts saving throws
-
Hellrider Longbow: +3 to initiative, pairs well with Alert feat
Combat Strategy Overview
Start each fight by entering Dragon Form for concentration reliability. Cast Darkness early to set up a safe space for your party. With your superior vision, target enemies who can’t see inside it, gaining constant advantage.
Spell Rotation Strategy
Use these combos:
-
Create Water → Cone of Cold for massive AoE damage
-
Darkness → Twin Haste for battlefield control
-
Hound of Ill Omen → Chromatic Orb to regenerate Sorcery Points
-
Dazzling Breath after casting Fireball for a bonus action nuke

Advantage in Darkness
You can attack freely inside Darkness, while most enemies stumble or miss. Use this to chain spells like Lightning Bolt, and reposition with Misty Step when enemies approach.
Bonus Actions and Reaction Use
Between Quickened Spell, Dragon Form Breath, and bonus action heals, your action economy is excellent. Use Counterspell as your main reaction to shut down enemy casters or protect a high-value ally.
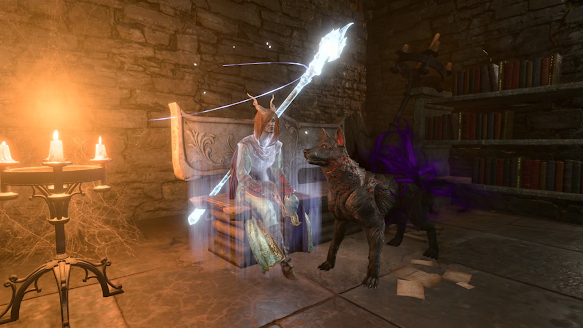
Pet and Summon Support
The Hound of Ill Omen persists through long rests, meaning you can maintain your Sorcery Point economy into future fights. Buff and heal your summon with Healing Word, and leverage its Ominous Bite to gain free Sorcery Points when needed.
Team Coordination Suggestions
Build your party around Darkness by giving teammates blind immunity. Consider including a Cleric with Hero’s Feast to make the party immune to poison (Cloudkill synergy). Use Spiritual Weapon to draw enemies into your AoEs.
Endgame Synergy and Optimization
At full level, your build supports:
-
Freecasting via gear
-
Multiple concentration zones
-
Near-constant advantage
-
High-damage AoEs
This makes it ideal for large battles, boss fights, and crowd-heavy encounters in late Acts.

Conclusion: A Balanced, High-Impact Build for BG3
The Shadow Sorcerer and Star Druid multiclass in Baldur’s Gate 3 offers some of the best spellcasting synergy available. With constant concentration stability, zone control through Darkness, and flexibility with Sorcery Points, this build excels in both offensive and defensive play. Whether you're clearing mobs with Lightning Bolt, buffing your team with Twin Haste, or locking down enemies with Hold Monster, you’ll always have tactical options.
Equip your party to support the Darkness strategy, and make sure you tailor your spell list and gear based on each act. This build thrives in both solo and group play, giving you the flexibility to adapt and dominate across all encounters.
Frequently Asked Questions (FAQ)
What is the main strength of the Shadow Sorcerer + Star Druid build?
Maintaining concentration is the biggest strength, allowing powerful spells like Darkness, Haste, and Hold Monster to stay active without interruption.
How does Dragon Form help in this build?
The Star Druid’s Dragon Form counts any Constitution saving throw roll under 10 as a 10, dramatically increasing the odds of maintaining concentration.
Is Wisdom or Charisma more important for this build?
Charisma is the priority stat, as it governs most offensive spells. Wisdom should be raised with gear or respecs to support Druidic and Illithid abilities.
What should I cast first in combat?
Start with Darkness to establish control, then Twin Haste or Create Water + Lightning Bolt depending on your role in the fight.
How do I regain Sorcery Points efficiently?
Use Chromatic Orb alongside the Hound of Ill Omen ability to reclaim points and extend your casting capacity.
Stay Connected with Haplo Gaming Chef
Haplo Gaming Chef blends gaming guides with casual cooking streams for a truly unique viewer experience. Whether you’re here for clean, no-nonsense walkthroughs or just want to chill with some cozy cooking content between game sessions, this is the place for you. From full game unlock guides to live recipe prep and casual chats, Haplo Gaming Chef delivers content that’s both informative and enjoyable.
You Can Follow Along On Every Major Platform:
YouTube, Twitch, TikTok, Instagram, Twitter/X, Threads, Bluesky, Pinterest, Flipboard, Facebook, LinkedIn, Tumblr, Medium, Blogger, and even on Google Business.
No filler, no fluff—just straight-up help for gamers and fun for foodies. Join the community today!
For More Guides Visit: Haplo Gaming Chef Website!


No comments:
Post a Comment