
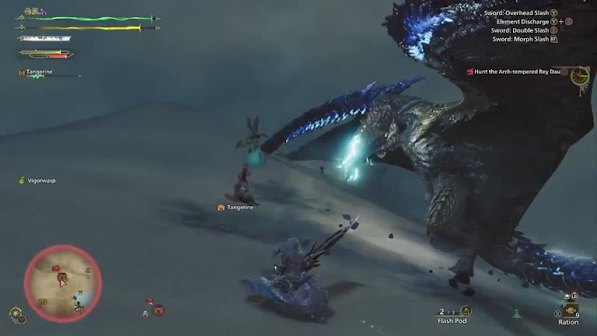
Facing Arch-Tempered Omen in Monster Hunter Wilds is like stepping into a ring where everything flips—literally. This 8-star creature comes with new mechanics, slick animations, and a fight that can feel overwhelming if you're not ready. Whether you’re a seasoned hunter or just getting into tempered monsters, this guide breaks it down from start to finish.
We’ll go over setup tips, damage strategies, Akuma-style gameplay quirks, and what to expect when Omen flips, belly-flops, or decides it’s time for a full elemental beatdown. Let’s dive into it.
Choosing the Right Loadout
Before you jump into the hunt, make sure you’re prepped. This isn’t your regular Duna encounter.
-
Recommended Gear: Spread Bowgun (now with improved recoil handling) or fast melee like Dual Blades.
-
Mantle Suggestion: Rock Steady works great with Akuma’s offensive style.
-
Skills to Boost: Focus on critical range for gunners, stun resistance, and health boost to stay longer in the fight.

What Makes Arch-Tempered Omen Different
You might’ve fought Duna before, but this isn’t the same. Arch-Tempered Omen is faster, hits harder, and shows new behavior patterns.
-
Wave attacks have longer reach – Make sure you learn their rhythm.
-
Dodges feel tighter – Use your iframe windows well.
-
Wounds matter – Knowing when and where to hit matters more than ever.
One standout mechanic is Omen’s ability to control water pressure—if the terrain’s wet, her flips hurt more. Use elevation to your advantage.
Offset Timing with Akuma
If you’re going in with the Akuma armor and animations, offsetting becomes a mini-game of its own. You’ll want to nail the timing because:
-
Offset gives bonus damage but only if you survive the hit.
-
Use Rock Steady to avoid knockbacks when you're learning the timing.
-
Input Precision is key – Mistime, and you’re pancaked.
Offset is at its best when you counter wave or belly-flop attacks. It’s all about watching her movement queues. The zoom-out animation feels great, but if nothing happens... yeah, that’s a whiff.
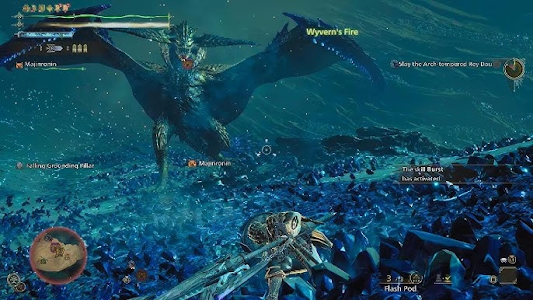
Environmental Awareness: Waves, Rain, and Elevation
Monster Hunter Wilds’ terrain is part of the battle. Omen’s water-based attacks change based on the weather and your surroundings.
-
During rainy phases, expect slippery movement and higher waves.
-
Cliff positions help ranged hunters maintain critical range while avoiding pressure zones.
-
Time of day matters – You’ll find water-based attacks hit harder in the early phase of the fight (think late spring in-game).
Use higher ground or wedge beetles to escape when needed.
How to Deal Damage Effectively
Getting good damage in against Arch-Tempered Omen requires careful planning.
-
Spread Bowgun feels good now – Recoil is reduced, and you can move forward slightly during the combo.
-
Critical Range is key – Stay in range or you’re wasting bullets.
-
If you’re using Akuma-style attacks, rotate square-triangle properly to maximize your DPS.
-
Remember: The triangle combo deals higher stun values. Use that when targeting the face.
Pro Tip: Avoid attacking randomly. Omen’s face is high-risk, high-reward. Keep an eye out for openings after a belly flop—they’re short, but safe.
Fighting in Phases: When Omen Gets Aggressive
Omen doesn’t start out wild—it ramps up. Early in the fight, you’re mostly dodging standard swipes and checking wave patterns. But as HP drops:
-
Belly flops become more frequent.
-
Multi-wave combos replace single hits.
-
Her dodge windows shrink, especially when she chains attacks.
The mid-phase is when most players cart if they’re not adjusting. If she starts dragging herself like she’s exhausted—it’s bait. She’s not. She’s setting you up.
Patch Notes Recap: How Difficulty Has Evolved
Recent updates to Monster Hunter Wilds adjusted quest spawns and monster frequency:
-
Higher difficulty quests now appear more often as your Hunter Rank increases.
-
Multi-monster hunts show up with better spawn rates.
-
Tempered monsters (not including Omen) got a visibility boost.
Ironically, Omen appears more than most, despite the patch excluding her. Devs probably realized she was already overrepresented.
Final Phase Tips: Surviving Omen’s Super Attacks
Near the end, Omen brings out the heavy attacks. Most dangerous among them:
-
High-speed flip into belly flop – Hits nearly the full arena width.
-
Charged water burst – Similar to Nami-style AoEs, but with delayed aftershocks.
-
Slam jump with electric feedback – Avoid standing in water zones.
This is where offseting feels risky. If you're not confident, go full mobility. Wirebug escapes > heroic death attempts.
Akuma Build Synergies and How to Maximize Style and Substance
Using the Akuma layered set doesn’t just look cool—it changes how you play.
-
Every movement has a fighting-game flair.
-
Offsetting becomes a statement, not just defense.
-
Your inputs mimic real Street Fighter combos, so mashing won’t cut it.
Use Rock Steady Mantle to avoid interruption, especially if you’re trying out the Shoryuken-style inputs for max stun.
Offset Mistakes: Common Errors to Avoid
Offseting looks cooler than it actually is—until you nail it.
-
Mistiming leads to full-damage hits.
-
Zoom-out animations don’t always mean a successful trigger.
-
Avoid trying to offset water burst attacks—their arc is awkward.
Practice on smaller monsters to get the rhythm. Once you understand the frame windows, it gets smoother.
Spread Bowgun Tactics That Actually Work
Spread has had ups and downs across patches. Right now?
-
Recoil is manageable.
-
You can stay in critical range by advancing slightly between shots.
-
The main benefit is sustained pressure—great against Omen’s short flinch windows.
Don’t treat it like a sniper loadout. Treat it like a shotgun on steroids, and play up close.

Fighting Around Omen’s Wounds
Targeting wounds correctly helps everyone on the team:
-
Omen's face, side fins, and tail base are woundable.
-
Don’t pop wounds randomly; let melee players capitalize.
-
Spread users should avoid wound zones if the monster is enraged.
This fight rewards coordination. There’s a visible difference in how long it takes if wounds are used properly.
Countering the Water Veil: Element Denial 101
The Water Veil is more than an aesthetic change:
-
It gives Omen increased range and secondary shocks.
-
Rolling through attacks is harder when you’re wet—your recovery slows.
-
Try to remove it when possible—it opens up more head and body shots.
Attack during exhaust windows or after a belly flop to knock it off faster.
How Height and Scale Affect the Fight
Fighting as Akuma can feel like you’re fighting from a lower angle—and that’s not wrong.
-
Akuma's model is slightly shorter and broader.
-
Makes targeting weak points awkward.
-
You may have to aim your hits higher or use slopes for elevation.
This affects both visual spacing and actual hit zones. Ranged users should recalibrate based on this lower perspective.
Making the Most of Cliffside Zones
Certain parts of the Wilds map favor smart players:
-
Cliffs and slopes give better visibility.
-
Range users can keep high ground and avoid Veil effects.
-
Wedge Beetles = escape tools if you mistime an offset.
Don’t stay grounded if you're getting comboed. Use elevation to reset the fight.

Understanding the Belly Flop Meta
Omen’s belly flop is a signature move—and often misunderstood.
-
It's not a guaranteed knockdown for her.
-
It can be offset, but the timing is narrow.
-
If it lands in water, the aftershock deals more damage.
Backstep dodges won’t work here. Use lateral dodges or just don’t be underneath her—ever.
Why Akuma’s Shoryuken Input Is Worth It
It might seem gimmicky, but the Shoryuken-style input has serious value.
-
Highest stun output of any Akuma combo.
-
Useful when targeting Omen’s head.
-
Helps set up KOs in mid-fight when used properly.
Problem is, it’s finicky. Learn the input in Training Area before you bring it into tempered hunts.
Late Fight Weapon Swaps and Support Roles
If you're doing group hunts, consider:
-
Switching to support roles in Phase 3.
-
Sonic bombs, Flash Pods, and Life Powder go a long way.
-
Rotate in and out depending on whether Omen is focused on you.
Speedrunners won’t want this advice, but survival is more important than shaving 2 minutes off.
Post-Fight Rewards and Why This Fight Is Worth It
Arch-Tempered Omen drops unique gear components:
-
Used in event-layered sets and upgrade paths.
-
Some of the best charm augment options come from her parts.
-
Her quests also give higher affinity jewels more often.
You’re farming her not just for challenge—but for real endgame value.
Akuma Speedruns: What to Watch For
This will be a real category.
-
Movement-based DPS checks.
-
Best players will chain offset > stun > full combo for crazy burst.
-
Expect niche gear combinations (like elementless boosts and critical eye).
Speedruns will probably clock around 8–9 minutes with perfect execution. Look for runs on cliffs for range DPS setups.
Conclusion: Is Arch-Tempered Omen Worth the Grind?
Absolutely. Arch-Tempered Omen is one of the most dynamic tempered monsters in Monster Hunter Wilds. Whether you're diving in solo or fighting with friends, this 8-star encounter forces you to rethink movement, positioning, and how you use your build.
From offset counters to terrain advantage, this isn’t just a hit-and-dodge boss—it’s one that rewards style and planning. If you’re using the Akuma set, the whole thing feels like a stylish throwback with modern mechanics.
It’s not the hardest fight in the game, but it might be one of the most satisfying once you get the rhythm down. So grab your Rock Steady, lock in your ammo, and let’s hunt.
Frequently Asked Questions
Q1: What is Arch-Tempered Omen in Monster Hunter Wilds?
A stronger, faster variant of the Duna monster with enhanced attack patterns and elemental effects.
Q2: Is the fight different when using Akuma gear?
Yes. The Akuma set changes animations and adds fighting-game-style offset mechanics for advanced counters.
Q3: What's the best strategy for Spread Bowgun?
Stay in critical range and move forward between shots. Avoid recoil stacking and always angle toward wounded areas.
Q4: What’s the most dangerous move from Omen?
The belly flop, especially during water-boosted phases. It has huge range and can cart players instantly.
Q5: How do you remove the Water Veil effect?
Consistent damage during openings like flops or post-AoE charges will knock it off. Target weak zones.
Stay Connected with Haplo Gaming Chef
Haplo Gaming Chef blends gaming guides with casual cooking streams for a truly unique viewer experience. Whether you’re here for clean, no-nonsense walkthroughs or just want to chill with some cozy cooking content between game sessions, this is the place for you. From full game unlock guides to live recipe prep and casual chats, Haplo Gaming Chef delivers content that’s both informative and enjoyable.
You Can Follow Along On Every Major Platform:
YouTube, Twitch, TikTok, Instagram, Twitter/X, Threads, Bluesky, Pinterest, Flipboard, Facebook, LinkedIn, Tumblr, Medium, Blogger, and even on Google Business.
No filler, no fluff—just straight-up help for gamers and fun for foodies. Join the community today!
For More Guides Visit: Haplo Gaming Chef Website!


No comments:
Post a Comment