
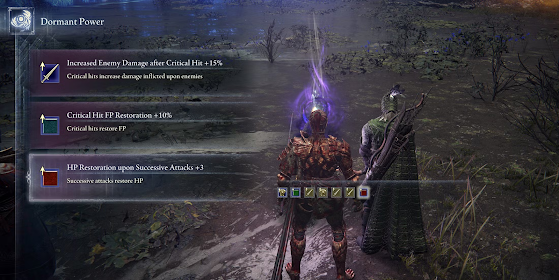
Introduction: A No-RNG, Status-Packed Build That Breaks the Game
If you're playing Elden Ring Nightreign and looking for a build that stacks massive damage while keeping you safe, the Executor class might just be your next obsession. This guide breaks down one of the most overpowered Nightreign builds in the game, featuring a unique combination of frost, poison, and bleed effects—all applied through a single weapon. On top of that, the build offers combat invisibility, stat boosts, and healing ultimates—with no RNG or hard-to-get remembrances required.
Whether you're new to Nightreign or a returning player aiming to steamroll bosses, this Executor status build delivers consistent, high-performance results using easy-to-access relics, a starter weapon, and smart upgrades.

Relics: The Core of This Status Overload Setup
To make this Executor build effective, you'll need three specific relics that are not only powerful but also easy to obtain without RNG or remembrances. The synergy they create is what turns this from a good build into a top-tier status effect powerhouse.
-
Executor's Urn (Relic Slot 1): Equip this with Knight of the Miasma. This relic activates frostbite damage and grants invisibility when enemies are afflicted by frost. You can get this setup by defeating the Knight Lord boss, a fight you can trigger by baiting it into a specific combat zone. The invisibility allows you to reposition safely mid-fight, which is key since the Executor class is a bit fragile.
-
Knight of the Wise (Relic Slot 2): This adds poison damage to your attacks and also boosts your attack power when there's poison in the area. Beat the Moth and Scorpion bosses to earn this. Combined with frostbite and bleed, this relic helps melt enemy health bars at an alarming rate.
Red Shop Relic & Why It’s a Game-Changer
The final relic is available directly from the shop and offers several bonuses that push this build over the top.
-
Red Relic (Shop Item): This relic activates roaring heals that restore health to both you and your allies when you use your ultimate. It also provides a passive +2 Dexterity and +2 Arcane, both of which scale perfectly with status effects and weapon efficiency. This relic isn't tied to a boss drop, so you can pick it up early and gain a permanent edge.
When all three relics are equipped, your weapon will apply three status effects at once while keeping you healed and hard to target. The combined effect is devastating against both bosses and mobs alike.
Weapons: One Sword, Triple Threat
This build revolves around the Executor’s starting weapon, which, surprisingly, is one of the most versatile tools in the game. Unlike most gear, this sword can apply frost, poison, and bleed simultaneously—making it perfect for status-based strategies. You don't need to hunt for legendary items; your starting gear is already tailored for this method.
To push the weapon’s effectiveness even further, aim to upgrade it to purple rarity as soon as possible. This step enhances not just raw damage, but also boosts the status buildup rate. With the three relics working in unison, a few well-timed hits can completely overwhelm even the toughest boss encounters.

Upgrade Path: Simple and Efficient
You’ll need two types of Smithing Stones to perform the early upgrades:
-
Smithing Stone 1 is available from a vendor on the main map. It’s affordable and unlocks the first tier of improvements.
-
Smithing Stone 2 can be mined from the early game’s mine dungeon, a relatively short trek that pays off instantly once you equip the upgraded weapon.
Once upgraded, your sword not only looks more powerful—it plays more powerful. Add-on effects scale harder, making each hit feel more impactful. This path keeps the build low-maintenance, allowing you to focus on gameplay rather than endless gear farming.
Armor, Talismans & Stat Focus: Survive While You Slash
The Executor class can feel a bit squishy at times, so the right armor and talismans are essential to improve your survivability. While this build focuses heavily on offense through status effects, you'll still need to reduce incoming damage and increase your ability to stay in the fight longer.
When choosing armor, prioritize sets that boost:
-
HP
-
Stamina
-
Damage negation
Don’t worry too much about looking for set bonuses or perfect pieces. Go with what you find that meets those three criteria. Since Nightreign offers various drops per run, your exact gear will vary, but any armor that makes you tankier without slowing you down fits this build perfectly.
Talismans: Flexible Buffs to Fit Your Run
Talismans are a great way to plug the gaps in your stats. Here’s what to aim for:
-
HP Boost Talismans – These are great for offsetting the Executor’s base vulnerability.
-
Stamina Recovery – More stamina means more swings and dodges, crucial when stacking three statuses.
-
Damage Resistance – Anything that lessens physical or magic damage will give you an edge in tougher boss fights.
Because talisman availability is run-dependent, don’t stress if you can’t get all three ideal types. The build is strong enough to handle late-game bosses even with average talismans, as long as you're using your weapon and relics correctly.

Combat Strategy: Simple Execution, Devastating Results
The beauty of this Executor build is in how easy it is to use. Once you’re geared and upgraded, the play style is straightforward but deadly. You’ll open each fight with Chilling Mist, which applies a frost effect to your weapon. This is key because it enables the invisibility trigger from your first relic once frostbite is active.
From that point on, your job is clear: keep hitting the boss. Each strike stacks bleed, poison, and frost while the invisibility mechanic helps you avoid retaliation. You don’t need to memorize patterns or dodge perfectly—status damage will do most of the heavy lifting for you.
Alternate Approach: Parry or Push Through?
If you're confident with parries, this build still supports that style. You can parry and then follow up with charged attacks to trigger status even faster. However, for most players, a direct aggressive approach is more effective with this setup.
Your role is not to tank hits but to apply pressure quickly. Since your relics and talismans offer healing, stamina, and invisibility bonuses, staying aggressive pays off more than holding back. Whether it’s a mini-boss or a major boss encounter, this build keeps you on offense, letting the triple-status combination shred through enemies with minimal risk.
Leveling Tips: Hit These Milestones for Smooth Progression
To get the most out of this build, aim for specific level benchmarks before entering key boss fights. Staying ahead of the level curve ensures your damage output stays high and your survivability doesn’t fall behind.
Here’s what to aim for:
-
Before Night One: Reach Level 7. This is where your weapon, relics, and stats start coming together, giving you a noticeable power boost.
-
Before Night Two: Try to hit at least Level 12. By this point, you’ll likely have all three relics equipped and your weapon upgraded. You’ll need the added stats for the tougher encounters ahead.
If you fall slightly behind, don’t worry—status builds like this are forgiving. The synergy between effects and healing keeps you viable even if you’re underleveled.
Extra Buffs & Forgotten Mechanics
There are a few less obvious systems in Nightreign that can give you an edge, especially when combined with this Executor build:
-
Ballooas: These consumables provide permanent buffs when eaten. Many players overlook them, but they're easy to get and can add noticeable improvements to your damage or resistance.
-
Flask Collection: Always be on the lookout for flask upgrades. More healing charges mean longer boss fights without having to reset or retreat.
-
Ultimate Rotation: Time your ultimate to activate when status effects are stacked. This ensures maximum damage while also triggering the healing from your red relic.
These additions might seem minor, but they help smooth out the build and create consistency in longer or more chaotic fights.
Conclusion: Why This Executor Build Stands Above the Rest
This Executor build in Elden Ring Nightreign offers a complete package: triple status effects, invisibility, healing, and stat boosts—all accessible without RNG. By relying on relic synergy, a fully upgraded starter weapon, and straightforward tactics, you get a build that’s both easy to use and brutally effective against every boss in the game.
Whether you're playing through Nightreign solo or co-op, this build delivers top-tier performance with minimal effort. Just stack status, manage stamina, and let your relics do the rest. It's a setup that rewards aggression, simplifies fights, and ensures that even the hardest content becomes manageable.
FAQs: Executor Status Build in Elden Ring Nightreign
Q1: Can this build be used for PvP or is it only for PvE?
A: While optimized for PvE, it can be adapted for PvP due to fast status stacking and invisibility, making it hard for opponents to react.
Q2: What if I can’t find all relics right away?
A: The build still performs well with just one or two relics. Add the others as you progress—each one adds more power, but isn’t required at the start.
Q3: Is this build beginner-friendly?
A: Yes. You don’t need advanced parry timing or rare weapons. The strategy is simple: apply status and stay aggressive.
Q4: What stats should I prioritize?
A: Focus on Dexterity and Arcane for better scaling with status effects, along with HP and Stamina for durability.
Q5: Does this build work for bosses with high resistances?
A: Yes. Even if one effect is resisted, the others usually aren’t. Plus, raw weapon damage and relic boosts still keep your DPS high.
🎮 Meet Haplo Gaming Chef 🍳
Level 99 Kitchen Warrior here! I'm on a quest to transform your gaming sessions into epic culinary adventures. When I'm not farming rare ingredients in MMOs, I'm crafting real-world recipes inspired by your favorite video games.
Specializing in: • Game-inspired recipe creation • Cooking quest guides • Power-up snacks for gaming sessions • Achievement-worthy meal prep
Join my party as we explore the delicious intersection of pixels and plates. Whether you're a casual foodie or a hardcore gamer, there's always room at my crafting table! #Gaming #GamingGuides #GamingChef #HaploGamingChef For More Visit: https://haplogamingchef.blogspot.com/
Follow Me!
https://bsky.app/profile/haplogamingchef.bsky.social
https://www.threads.com/@haplogamingchef
https://www.twitch.tv/haplogamingchef
https://www.pinterest.com/haplogamingchef
https://www.youtube.com/@HaploGamingChef
https://www.tiktok.com/@haplogamingchef
https://flipboard.com/@HaploGamingChef
https://x.com/HaploGamingChef
https://www.instagram.com/haplogamingchef
https://www.facebook.com/HaploGamingChef
https://www.linkedin.com/in/haplogamingchef
https://haplogamingchef.blogspot.com
https://www.tumblr.com/haplogamingchef
https://medium.com/@haplogamingchef
Google Business Profile: https://g.co/kgs/SLVFpRa


No comments:
Post a Comment