
Why Go Tanky with the One Punch Titan?
If you're diving into Path of Exile 2 and looking for a build that doesn't stress you out every time a mob blinks in your direction, the tanky One Punch Titan setup is where it's at. While most builds chase raw damage and fast clears, this version leans into defense, consistency, and ease of mapping.
With a shield in hand and a block chance that can reach 75%, this setup allows you to comfortably run juiced maps without constantly staring at your health bar. It's not the flashiest build out there, but it handles nearly everything you throw at it—and it does so on a budget.
This guide walks you through how to build it from the ground up, explaining gear, passive tree adjustments, skill choices, and how to scale it based on your playstyle or currency budget.
What Makes This Build Special?
-
Survivability: 75% block chance means you’re tanking hits like a champ.
-
Budget Friendly: You don’t need insane gear to make it work.
-
Great for Mapping: Comfortable pace, no constant deaths.
-
One-Shot Potential: Still hits hard, especially against bosses.
-
Flexible Scaling: Easy to adjust for more offense or more defense.

Gear Breakdown – What You Need and Why
This setup’s biggest strength is its accessibility. You don't need high-end rare items or ultra-specific uniques to get rolling. Here’s a gear breakdown that balances performance with affordability:
-
Shield: Look for high block chance, maximum life, and physical damage reduction. Even a 10 Exalted Orb shield can carry you through endgame content.
-
Main Weapon: Prioritize high base physical damage. This weapon handles your bossing potential. Your second weapon slot can be cheap or even unused.
-
Helmet, Chest, Gloves, Boots: Focus on life, resistances, and if possible, additional armor or evasion. You don't need offensive stats here.
-
Amulet and Rings: Life, resists, and damage stats like physical or melee damage are ideal. Strength is a bonus for scaling.
-
Belt: Stygian Vise or Leather Belt with life, strength, and elemental resistances.
You can definitely min-max later, but the above will get you through most content comfortably.
Passive Tree Adjustments for Shield Setup
Since we're shifting to a shield-based layout, the passive skill tree needs a few tweaks compared to the dual-wield version.
-
Block Clusters: Invest in both nearby shield block clusters to hit your 75% cap.
-
Ancestral Bond: Drop Mysterious Lineage and spec into Ancestral Empowerment for improved AoE and utility.
-
Damage Recovery: Pick up life regen or armor-based mitigation to deal with chip damage.
-
Optional Flex Points: If you're not feeling squishy, consider shifting some defensive nodes into attack speed or area of effect passives.
The result is a build that blocks more, dies less, and still punches hard. And thanks to Earthbreaker Totem + Leap Slam synergy, it still feels fluid and mobile.
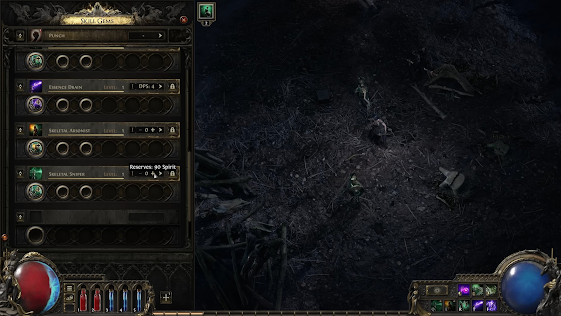
Skills and Supports – Slam Everything That Moves
The star of this build is still Leap Slam, but its function changes a bit with this tanky setup. You’re not just jumping for mobility—you’re jumping to kill.
Here’s the typical skill setup:
-
Leap Slam + Pulverise + Fist of War + Shockwave + Earthbreaker + Endurance Charge on Melee Stun
-
Warcry (General's Cry or Enduring Cry) to boost survivability or trigger slams
-
Aura Setup: Determination, Herald of Purity, and Defiance Banner
-
Utility Skills: Molten Shell, Curse on Hit setup with something like Vulnerability or Punishment
Make sure Leap Slam hits as hard as possible by investing into aftershock mechanics. Earthbreaker Totem ensures you get a second, massive burst of damage right after landing. This double-tap can one-shot most non-boss enemies and still chunk bosses heavily.
Block Mechanics – How You Hit 75% and Why It Matters
Here’s where the shield build really shines.
By investing into:
-
Two major block clusters on the tree,
-
A shield with base block + corruption (if possible),
-
Optional block from Ascendancy or gear modifiers,
...you can easily cap block at 74%–75%.
And why is that important? Because block in Path of Exile 2 works against:
-
Projectile attacks (especially deadly ones from breach mobs),
-
Melee hits,
-
Many spell-based threats (with the right nodes or items).
Block means you reduce incoming damage by a huge margin, especially when paired with life gain on block or recovery mechanics. It’s one of the best forms of defense available, particularly in maps with multiple damage mods.

Budget Scaling – Why This Version Costs Less
One of the best things about this version of the One Punch Titan is how easy it is on your wallet. Here's why:
-
You only need one good weapon. Since your second hand is a shield, you don’t need to invest in two high-damage weapons. A single solid physical weapon is enough.
-
Shield cost is low. A shield with good block chance, life, and maybe some physical damage reduction can cost as little as 10 Exalts. For high-end players, that's cheap.
-
No need for expensive corruptions or alt-quality gems. Your damage output is solid even with regular support gems and a standard rare weapon.
This makes it a perfect build for players who want a reliable character for mapping, farming currency, or testing endgame bosses without burning through resources.
Area of Effect Trade-Off – How to Handle the Loss
When switching to a block-focused setup, you're trading off a bit of area coverage for better survivability. That’s the price of dropping AoE clusters and adjusting the skill tree for shield passives.
But here’s how to deal with it:
-
Pick up “Aftershock” nodes and use Earthbreaker Totem. These ensure your AoE stays impactful, even if smaller.
-
Use Ancestral Empowerment. This compensates a bit for lost coverage by increasing AoE on supported attacks.
-
Positioning matters more. Leap into the center of packs to trigger Aftershock where it will hit the most enemies.
The result? Slightly tighter AoE, but still enough to clear maps efficiently. And what you lose in radius, you gain back in not dying to random mobs or spike damage.
Single Target Damage – Still One-Shotting Bosses
Even with a shield and slightly reduced damage scaling, this build still melts bosses. Thanks to mechanics like Aftershock, Warcry buffs, and Fist of War, your Leap Slam delivers burst damage that’s enough to one-shot or two-shot most enemies—even bosses.
Here’s how to maximize your single-target hits:
-
Time your Warcry to line up with the Leap Slam.
-
Use Shockwave support to stack on even more damage.
-
Consider Rolling Slam if you want a more boss-oriented slam skill over Leap Slam. It has a stronger multiplier, but less mobility.
-
Keep bosses cursed with Vulnerability for a big damage bump.
Even in high-tier maps or against pinnacle bosses, you’re rarely in a fight long enough to take sustained damage. One or two well-placed slams usually end it.
Flexible Passive Options – Tailor It to Your Needs
Once your core defense is online, the rest of your passive tree is flexible. You can adjust it based on whether you want:
-
More tankiness: Pick up additional life nodes or armor scaling.
-
More speed: Invest in attack speed clusters, especially if you swapped out skill speed runes.
-
More damage: Allocate into melee crit, physical damage, or totem enhancements.
Here are some example options:
-
Drop unused stun immunity clusters if you have that on gear.
-
Shift from AoE notables to damage or speed, depending on feel.
-
Consider Megalomaniac jewels for specialized notables like Aftershock or Cremation.
This flexibility keeps the build fresh, scalable, and easy to tailor for late-game goals or personal preference.
Using Megalomaniac Jewels – High Impact for Cheap
Megalomaniac jewels are one of the best ways to push this build further in the late game. While perfect rare jewels are great, a Megalomaniac with two or three solid notables can easily outperform them—often for a lower cost.
Look out for notables like:
-
Aftershocks – lets you drop the regular passive and reclaim points.
-
Cremation – free bonus damage effect.
-
Exposed to Inferno, Burn Away, Coming Calamity – all synergize with melee and fire-based slam skills.
-
Acceleration – gives skill speed and attack speed, covering both offense and smoothness.
You don’t need a perfect roll. Even a two-good-notable jewel can be an upgrade and often costs just a few divines. Swapping these in gives you another layer of fine-tuning your build without rerolling your whole setup.
Map Modifiers and Dangerous Encounters – What You Can Tank
This build is designed to be stress-free for mapping, and here’s where it proves its worth.
Thanks to the high block rate and consistent recovery:
-
Double damage mods? No problem.
-
Extra projectiles? Block handles most of them.
-
Tough breaches and citadel mobs? Their burst damage is manageable with your block + life setup.
Even if a boss gets the jump on you, your 75% block gives you time to respond, reposition, and strike back. Only extremely high-damage spellcasters or mechanical one-shots can threaten you, and even then—proper movement and cooldown use often handle the threat.
It’s one of the safest mapping experiences available in Path of Exile 2 today.
Final Thoughts – Comfortable, Cheap, and Capable
This 75% block One Punch Titan variant proves that you don't need glass-cannon damage or ultra-expensive gear to thrive in Path of Exile 2. It's built for comfort and control, and whether you're pushing maps, farming, or casually exploring endgame content, it keeps you alive and powerful.
Key takeaways:
-
Reliable defense with max block and optional life scaling
-
Strong single-target damage thanks to Earthbreaker + Aftershock synergy
-
Easy gear progression, no mandatory uniques or inflated pricing
-
Adjustable skill tree for your personal style—offense, defense, or speed
-
Flexible and scalable for new players and veterans alike
If you want a PoE 2 build that lets you sit back and enjoy the game without constant stress, this is it. Swap a weapon for a shield, follow the tree changes, and you’re good to go.
🎮 Meet Haplo Gaming Chef 🍳
Level 99 Kitchen Warrior here! I'm on a quest to transform your gaming sessions into epic culinary adventures. When I'm not farming rare ingredients in MMOs, I'm crafting real-world recipes inspired by your favorite video games.
Specializing in: • Game-inspired recipe creation • Cooking quest guides • Power-up snacks for gaming sessions • Achievement-worthy meal prep
Join my party as we explore the delicious intersection of pixels and plates. Whether you're a casual foodie or a hardcore gamer, there's always room at my crafting table! #Gaming #GamingGuides #GamingChef #HaploGamingChef For More Visit: https://haplogamingchef.blogspot.com/
Follow Me!
https://bsky.app/profile/haplogamingchef.bsky.social
https://www.threads.com/@haplogamingchef
https://www.twitch.tv/haplogamingchef
https://www.pinterest.com/haplogamingchef
https://www.youtube.com/@HaploGamingChef
https://www.tiktok.com/@haplogamingchef
https://flipboard.com/@HaploGamingChef
https://x.com/HaploGamingChef
https://www.instagram.com/haplogamingchef
https://www.facebook.com/HaploGamingChef
https://www.linkedin.com/in/haplogamingchef
https://haplogamingchef.blogspot.com
https://www.tumblr.com/haplogamingchef
https://medium.com/@haplogamingchef
Google Business Profile: https://g.co/kgs/6nqgw9H


No comments:
Post a Comment