How to Defeat Tricephalus (Gladius) in Elden Ring: Nightreign Boss Guide


Introduction

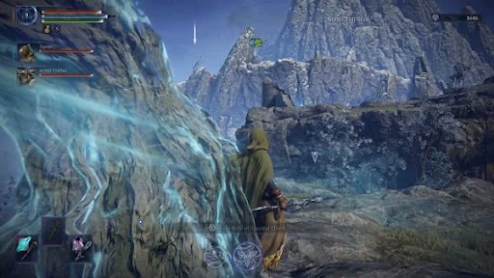
Taking on your first major boss in Elden Ring: Nightreign can feel overwhelming—especially when it's the ferocious Tricephalus, also known as Gladius. Whether you’re venturing in solo or teaming up with other hunters, this guide will help you prepare, survive, and ultimately defeat this three-headed beast. We’ll break down the fight step-by-step, with a focus on Iron Eye strategies, holy damage usage, and how to manage each phase without getting wiped out.

If you’re struggling with positioning, dodging, or keeping up with the chaos when Gladius splits into three separate enemies, don’t worry—we’ve got you covered. Here’s everything you need to know to come out on top in this tough but manageable boss battle.

Prepare for the Fight: Gear Up with Holy Damage

Before entering the battle with Tricephalus, the most critical thing to do is equip yourself with holy damage weapons or spells. The boss has a noticeable weakness to holy-based attacks, which makes them your best bet for maximizing damage. If you're playing as Iron Eye, use ranged options like holy arrows or spells that scale with your build. Check nearby merchants, chests, or item drops in the area for anything tagged with holy bonuses. This choice can significantly shorten the length of the fight if used properly from the start.

Before the arena loads, observe the boss preview—it’s a helpful hint that shows what kind of damage works best. Make sure your team members also understand the importance of holy damage. Even if you're matched with random players online, having one person focused on healing and another on holy DPS helps keep things balanced. If possible, go in with a full group to spread out aggro, since this boss tends to switch targets quickly and unpredictably.


Watch the Attack Patterns: Dodging Matters

Tricephalus uses sweeping sword strikes and fast lunges that can easily overwhelm an unprepared team. One of the most dangerous moves comes from the leftmost head, which swings a large sword in a wide arc. The best way to handle this is to dodge roll into the attack, not away from it. Doing so reduces the window of impact and helps you get back into position quickly. For frontal lunges, side rolls are more effective at dodging cleanly.

Positioning is everything. Even when you're behind the boss, some of its moves—especially stomps and tail whips—can still land. Try to always keep an eye on the movement of the heads. As soon as you see one wind up, anticipate a strong area-of-effect move. If you’re playing as a ranged character, stay at mid-range—not too far to miss out on team synergy, and not too close to eat heavy damage. Mastering these dodge timings will make or break your run.

Use Your Abilities Often and Rotate Aggro

In this fight, your ultimate abilities aren't just flashy—they're essential. Don’t hold back waiting for a perfect moment. Tricephalus can soak up a lot of damage, and using ultimates early and often helps push it toward its next phase faster. Iron Eye’s ranged ult can keep you safely distanced while still contributing serious DPS, and it pairs well with marking skills to amplify team damage. Tag the boss to draw attention and give your allies room to breathe.

Team coordination is key. Since Tricephalus tends to rotate targets between players, try to manually switch aggro to avoid overwhelming one player. Use ranged attacks to pull its focus when a teammate is low on health. Spreading out aggro also creates natural windows for healing or revives, especially when someone goes down. Iron Eye’s healing arrows are clutch here—you can bring allies back without ever stepping into danger, making him an ideal support during hectic moments.


Phase Shift: Prepare for the Three-Dog Split

After you deal enough posture or health damage, Tricephalus will begin a howling phase, signaling a transition. This is the danger zone—run away immediately. Do not use any abilities or try to rush in, as the boss will explode and split into three smaller wolves, one of which still carries the sword. This sword-bearing dog is much more aggressive and hits harder than the others, so keep your distance from it if you’re not at full health.

Each of the three dogs behaves differently. The two without weapons are slower and easier to manage. Assign teammates to kite or distract them while someone focuses on pulling the sword dog away from the group. Use this chance to build up posture damage again—once one dog drops, the rest will follow more easily. Be mindful of your positioning though. If you’re too far from your teammates, and someone gets downed, they might not be reachable in time for a revive.

Stay Alive: Defense Over Offense

During the three-dog phase, playing defensively is more important than doing high DPS. If the sword-wielding dog locks on to you, it's better to run and dodge than to risk trading blows. Look for cover spots or wide open areas where you can safely lead it away from your team. If you're playing solo, keep all three dogs in your view as much as possible. Losing track of one can mean getting ambushed from an off-screen lunge.

Watch for the red circle indicator that appears on your character—it shows when you have aggro. This is your signal to go defensive, bait attacks, and let your teammates take over the offensive pressure. If everyone understands this mechanic, you can naturally rotate roles mid-fight without needing voice communication. A great tactic is to lure one dog away while maintaining just enough distance to stay within healing or revive range of the others.


Use Environment and Items to Your Advantage

Throughout the arena, you’ll find worn gravestones and terrain dips you can use for quick cover or strategic repositioning. These aren't foolproof, but they help break line of sight or interrupt attack chains. Don’t ignore item use—if you have a Spear Calling Bell, it’s a great tool to spend FP instead of arrows, especially if you’re using a ranged build. Summoned spirits can distract one of the dogs and create a crucial opening.

Warming Stones are also incredibly useful here. Place one near a safe zone when your team is grouped up, especially after the phase transition. This allows passive healing while freeing your main healer to focus on support attacks. If you're Iron Eye, remember your revival ability from range is one of your biggest strengths. You don’t have to risk a melee revive—stay safe and contribute with ranged support until the dogs are manageable again.

Managing the Final Phase: Return to Tricephalus

After taking out the three split forms, Tricephalus reforms into its original three-headed body. This is your chance to close out the fight if your team is coordinated. However, the final form is still dangerous, especially because all three heads can now alternate attacks rapidly. The sword head remains the biggest threat, so keep your dodges sharp and don’t linger near its flank. Resume aggro rotation and keep an eye out for big telegraphs.

At this point, it’s a battle of endurance. If your team’s FP or health items are running low, prioritize survival over risky attacks. Let the boss overextend and create its own punish windows. Keep marking the target to help your team land higher burst damage. Healing items and ranged revival support are your lifeline here—especially if one or more players go down during the chaos. Stick together, share aggro, and keep dodging smartly.


General Tips to Keep in Mind

  • Use holy damage for max effectiveness

  • Dodge into arcing sword swings, not away

  • Manage aggro rotation to avoid overwhelming any one player

  • Run during the howl to avoid the explosive transformation

  • Use terrain and Warming Stones for defense and recovery

  • Play defensively during the three-dog phase

  • Use Iron Eye’s ranged revive to keep allies in the fight

  • Save ultimates for crucial moments, especially near the end


Conclusion

Defeating Tricephalus (Gladius) in Elden Ring: Nightreign may feel intimidating at first, but it’s very manageable once you know the patterns and go in prepared. Focus on bringing holy damage, mastering your dodge timing, and staying defensive during the three-dog split phase. Whether you're using Iron Eye or another class, proper aggro rotation and team communication—even if silent—go a long way.

Make use of terrain, healing items, and range-based support skills like Iron Eye’s revival arrows to survive longer and keep your group in the fight. Remember, this battle isn’t just about dealing high damage—survival and positioning are the keys to victory. Follow this guide, and you'll have no trouble clearing one of Nightreign's toughest early bosses.


FAQ – Beating Tricephalus (Gladius) in Elden Ring Nightreign

Q: What is Tricephalus weak to?
A: Holy damage is Tricephalus's main weakness. Use holy weapons, spells, or arrows to deal maximum damage.

Q: What class is best for this fight?
A: Iron Eye is especially useful due to his ranged revival ability and support skills. However, any class can win with the right preparation.

Q: How do I avoid the explosion during phase shift?
A: When the boss starts howling, run away immediately. This triggers a blast and a transformation into three dogs.

Q: Which dog is the most dangerous after the split?
A: The one with the sword. It's more aggressive and does the most damage, so prioritize avoiding or isolating it.

Q: How can I revive teammates without dying?
A: If you're using Iron Eye, use his arrows to revive downed allies from a safe distance.

Q: What items help the most?
A: Warming Stones (for healing) and Spear Calling Bells (for FP-based summons) are both very effective in this battle.

Q: How do I know when I have aggro?
A: Look for the red circle indicator on your character—this means the boss is targeting you.


Share:

Night Reign Weapon Farming Guide – How To Get Top-Tier Gear Fast


Introduction: Getting Geared Up in Night Reign

If you're diving into Elden Ring: Night Reign, one of the first priorities is finding solid gear to survive the game's brutal world. Whether you're into ranged combat, spellcasting, or heavy melee builds, knowing where to look for the right equipment makes all the difference.

This guide walks you through all the major locations for finding bows, staves, seals, and melee weapons, with details on how each area works and what types of loot you can expect. From secrets inside churches and forts to loot-packed ruins and hidden chests, we’ll help you optimize your farming routes and build out your character with the best tools early on.

Finding Seals in Church Locations

Churches are one of the best spots to pick up seals in Elden Ring: Night Reign, and they come in several types. The more prominent churches, especially the ones with envoys or golems, often have elevated platforms. Climb the pillar outside and check the small statues near the top—these often contain seals. You'll also come across a chest on the way up, and more often than not, it holds useful items like stone sword keys or bonus seals.

If you're inside a church with a holy symbol on it, expect a boss encounter with envoys on the main floor. However, churches with fire symbols or no icon at all usually have basement access, leading to catacomb-style zones packed with loot. In those cases, you can drop down, bypass the boss, grab the chest, and loot some strong passive gear like bonuses to two-handed weapon damage. Don’t skip the statue-like enemies either—some of them function like treasure chests and drop random weapons or utility items.


Exploring Forts for Staves and Sorceries

Forts in Night Reign offer two main layouts—one with open ground access and another that requires entering from below a bridge. These locations often hold staves and gear useful for sorcery builds. Once inside, clear the ground-level treasure rooms and check the higher levels for boss enemies or loot tables. The upper rooms are where you'll usually find staffs and items marked on the map for easier tracking.

Some forts also feature spirit stream jumps outside. If timed right, you can use these to leap straight onto the upper level, landing right where the best loot is. It's a shortcut worth mastering if you want to speed-run weapon collection. Don’t forget to interact with any tables you find—they often highlight nearby gear and help map out future stops.

Ruins and Elemental Loot Farming

Ruins in Night Reign are treasure-heavy areas, great for grabbing status-affecting weapons and utility items. Most ruins feature staircases that lead underground to treasure chests containing items like grease, pots, and status-based gear. The type of ruin usually determines the loot—expect to find holy, poison, madness, frostbite, or deathblight-themed items depending on the location. If you're chasing a specific elemental build, it's worth targeting these ruins early.

You’ll typically find two treasure zones per ruin, making them efficient for fast loot runs. Ruins also seem to have a higher drop rate for katanas, although that may vary based on RNG. Keep an eye out for perfumer ruins as well—those are perfect for players looking to gather perfume bottles and build around perfumer-style gameplay. For quick upgrades and consumables, these are ideal grinding spots.


Sorcery Towers and Puzzle-Based Rewards

Another high-value spot for magic users is the sorcery towers. These towers usually require solving a mini-puzzle to remove a magic barrier before entry. If you see a glowing blue wall, that means the tower can be accessed once the linked contraption is activated. These puzzles are usually about spotting environmental differences or tracking down a nearby seal to break.

Once inside, the top of the tower holds solid loot—usually a mix of passives and weapons, including a guaranteed staff. This makes towers one of the most consistent ways to collect sorcery gear. If you're short on guides, just take your time observing the surroundings, as most tower puzzles rely on visual clues rather than combat.


Weapon Loot from Encampments and Fire Camps

Encampments are excellent spots to pick up a wide variety of melee armaments, such as flails, maces, axes, great axes, and shields. These areas are packed with enemies, and most of them have chests scattered around the site. While many players overlook them, these chests often contain solid melee weapons, making them essential for strength or dexterity-based builds. Also, don’t skip the bow racks—they’re specifically useful for ranged characters looking to expand their arsenal.

Some enemies in these zones carry treasure chests and drop rare loot when defeated. For higher drop rates, it’s smart to use a Silver-Pickled Fowl Foot before opening chests or engaging those enemies. Fire camps are even more efficient. They're guarded by flame chariots, which can be taken down by jumping on them from behind and using a basic attack. It's a quick method to farm bosses, earn a ton of runes, and collect high-end drops without too much resistance.


Finding Statues and High-Tier Loot

Throughout the world, you’ll also encounter breakable statues. These require a high-damage attack to destroy—some ultimate abilities or heavy skills like the Raider’s ult can do the job. Just be careful where you use it. If the statue is destroyed directly above the loot spot, the reward may get stuck inside and become inaccessible.

Inside these statues, you’ll often find advanced loot, including items that would normally only drop much later in the game. These areas are crucial if you're trying to accelerate your progression or farm gear with high rarity early on. They’re also one of the few consistent ways to get multiple copies of powerful gear types for power-stancing builds.

Tunnels, Legendary Armaments, and Loot Replication

Tunnels are a critical destination for any player wanting to upgrade weapons quickly. These areas typically house a boss and reward you with Smithing Stone Level 2, allowing you to upgrade a purple-tier weapon early. Even if you’re not aiming to fight the boss, it’s worth checking the chest at the end first—it might already contain the smithing stone. That way, you avoid wasting time or double-looting the same upgrade item.

The central castle area becomes key on day two of your playthrough, especially if you manage to activate a shifting earth event. With that done, you can access the crater zone, beat the magma worm, and unlock a legendary armament at the special smithing table. This crafting station lets you convert eligible items in your inventory into full-blown legendary weapons—ideal for maximizing stats and utility without relying entirely on random drops.


Armament Replication and Field Boss Loot

There’s also a rare mechanic called armament replication, triggered when you find a glowing red circle on the map. Interact with it to copy a weapon you already own, which is perfect for players who want to dual-wield powerful gear. If you're aiming to power-stance, this saves you from relying on RNG for a second matching item.

Keep an eye on field bosses, too. Many of them drop loot up to legendary quality, making them essential for farming powerful weapons. Bosses also have higher loot roll chances for specific item types depending on the camp, so knowing which areas drop what can save you a lot of time. The more you understand these mechanics, the easier it becomes to optimize your loadout and push through tougher areas without grinding endlessly.


Conclusion: Loot Smarter, Not Harder in Night Reign

Whether you're starting out or planning your endgame build in Elden Ring: Night Reign, understanding where and how to get the right equipment is a major part of the experience. From churches with hidden seals to forts that reward exploration with powerful staves, and from encampments full of melee gear to sorcery towers hiding magical weapons, each location offers unique advantages.

Don't overlook the utility of ruins, the upgrade paths in tunnels, or the value of loot replication. Use tools like the in-game visual codex and the detailed map filters to spot merchants, smithing tables, and other vital resources. Farming isn’t just about luck—it's about knowing where to look. Master that, and you’ll be armed with top-tier gear much faster than you'd expect.


Frequently Asked Questions (FAQ)

Q1: Where’s the best place to find seals in Night Reign?
A: Churches with a holy symbol or catacomb-style basements are your best bet. Seals can also be found in statues and random huts.

Q2: Can I get staves early in the game?
A: Yes. Forts often have staff drops, especially on upper levels. Some treasure tables inside let you locate gear on the map.

Q3: How do I open sorcery towers?
A: Most require solving a small environmental puzzle or breaking a nearby seal. Once inside, you'll often find a guaranteed staff drop.

Q4: What's the fastest way to get melee weapons?
A: Head to encampments and open every chest. Fire camps with flame chariots are especially efficient for rune and weapon farming.

Q5: How do I replicate weapons?
A: Look for red glowing circles on the map. These allow you to create a copy of any armament you already possess—perfect for power-stancing.

Q6: What’s in the ruins?
A: Mostly utility and status gear like grease, pots, and sometimes katanas. Great for status builds like poison, frost, or madness.

Q7: How do I craft a legendary weapon?
A: Find the crater, beat the magma worm, and access the legendary smithing table. Any suitable item in your inventory can then be upgraded to legendary status.

Q8: What’s the use of statues?
A: Break them open using high-damage ultimates to reveal advanced loot. Just be careful not to glitch the drop inside the statue.


Share:

Elden Ring Nightreign: Secret Mountaintop Route & Rewards Guide


How to Unlock the Mountaintop Secret Event

The Mountaintop Secret Event in Elden Ring Nightreign is part of the larger Shifting Earth questline, and it doesn't show up at the same time for everyone. For most players, this becomes available on the mission select screen after beating around three unique bosses. If it’s unlocked, you’ll notice the event highlighted at the Roundtable Hold mission screen.

Once it’s active, head into the mission and open your map. Look toward the northwest corner—you'll see a massive snowy mountain. That’s your destination.


When to Attempt the Event & Recommended Level

Timing matters here. It’s smart to tackle the mountain at the end of day two, just before nightfall. This is because the area is full of high-level enemies that can hit hard, and your character will need solid gear and timing to survive.

  • Recommended Level: Level 10 is ideal

  • Minimum Level: Can be done at level 8–9 with skill and timing

  • Helpful Gear: Equip a relic with frostbite resistance

You’ll be facing multiple sources of frostbite buildup, so any extra resistance helps a lot.

Starting the Climb: Where to Go First

To begin your ascent to the secret mountaintop location, go to the southern base of the snowy mountain. You’ll find a spirit spring—those launch pads you can ride upward. This one kicks off your journey to the summit.

  • Goal: Reach the red flag marker shown on your map

  • Path Strategy: As long as you're going uphill, you're on the right track

  • Pro Tip: Mark the red flag icon to keep your target visible at all times

After using a few spirit springs, you’ll come across a climbable wall. That’s where things get serious.


Dealing With the Mountaintop Ice Dragon

Once you reach the upper cliffs, you'll be ambushed by the Mountaintop Ice Dragon, a brutal optional enemy that deals heavy frostbite damage.

Here are your choices:

  • Fight it: The dragon can take a ton of damage, and fighting it is tough but doable

  • Avoid it: Like in earlier events (e.g., the crater), you can ignore this enemy and still complete the mission

If you’re not geared to fight the dragon, don’t worry. One of your AI allies—the Duchess—may trigger her ultimate skill, causing the dragon to lose aggro. Use that moment to pass by without engaging.

  • Tip: Keep healing stocked; once you’re hit by frostbite, heal up fast

  • Frostbite Resistance: Keeps your movement and attack speed stable under pressure

Next, you'll need to watch for environmental cues to continue the climb.

Crossing the Chains: How to Stay on Course

As you keep moving uphill, you'll notice white lines on your minimap. These represent the chains that link parts of the mountain. They act as bridges and are essential for staying on the right path.

Here’s what to look out for:

  • First Set of Chains: Leads you past the ice dragon’s area

  • Second Set: Appears as you turn a corner—this confirms you're nearing the summit

The fog can make it tricky to spot your next step. Wait for a brief moment of clarity, then use the map and visible terrain to plan your route. Stick to high ground and use spirit springs when available.

  • Important Note: You won't need to go downhill—just keep ascending

  • Mini Map Tip: Watch the elevation on your player marker to confirm you're rising


Final Climb and Unlocking the Mountaintop Reward

Once you pass the second chain, it’s just a few more uphill turns before you reach the final red flag marker. Near this spot, you’ll discover a Site of Grace—make sure to rest here and spend any accumulated runes.

This area contains the secret of the mountaintop, which includes a unique reward:

  • Unlocks: Power of the Mountain Tops

    • Halves frostbite damage

    • Reduces frostbite buildup

    • Boosts your attack when nearby enemies are frostbitten

While the reward might seem underwhelming for casual players, it’s highly useful against future bosses and particularly beneficial if you want to return and challenge the ice dragon boss for bonus loot and tons of runes.


Conclusion: Why the Mountaintop Event Matters

The Mountaintop Secret Event in Elden Ring Nightreign isn't just a side mission—it's a vital part of prepping for day three and beyond. While it’s not mandatory to defeat the Ice Dragon boss, unlocking the Power of the Mountain Tops offers a significant edge, especially when frostbite becomes more common in later zones.

Even if the reward feels minor now, it synergizes well with builds that exploit status effects and can save you from constant healing interruptions during longer boss fights.

  • Recommended Final Step: After unlocking the site of grace and claiming the mountaintop power, return later to challenge the dragon

  • Post-Event Strategy: Use your new resistance boost to clear tougher enemies on day three

  • Bonus: Finishing this objective also counts toward larger quest chains, including events that involve defeating three bosses in succession

If you’re aiming to complete Elden Ring Nightreign thoroughly, skipping this event isn’t advised.


Key Takeaways

  • Unlocks after defeating 3 unique bosses

  • Best attempted at the end of Day 2

  • Equip frostbite resistance gear

  • Use spirit springs and chains to climb

  • Dragon is optional—but offers high rune reward

  • Claiming mountaintop power boosts frostbite resistance and attack


Frequently Asked Questions (FAQ)

How do I unlock the Mountaintop Secret Event in Elden Ring Nightreign?

You can access this event after defeating about three unique bosses. It becomes available on the mission select screen at the Roundtable Hold. Look for the snowy mountain icon in the top-left corner of the map.

What level should I be to complete the Mountaintop Event?

Level 10 is recommended, but it’s doable at level 8 or 9 with good equipment and careful navigation. This is a tough area, so wait until the end of day two before attempting it.

What is the red flag icon on the map?

The red flag marks the final destination of the event. Reaching it completes the Mountaintop mission and unlocks the reward. Mark it early so you can stay on course.

Can I skip the Mountaintop Ice Dragon?

Yes. The dragon is optional and extremely tough. You can bypass it by using cover, waiting for AI support like the Duchess, or simply running past once its aggro is lost.

What reward do I get for completing the Mountaintop Event?

You gain the Power of the Mountain Tops:

  • Halves frostbite damage and buildup

  • Boosts your attack near frostbitten enemies

Are the chains important for navigation?

Absolutely. The chains link different mountain sections and are essential for progressing uphill. Watch your mini map for white lines showing where they’re located.

Is it worth going back to fight the Ice Dragon later?

Yes. Defeating the Ice Dragon gives a large number of runes and may drop frostbite-resistant gear useful for final boss fights.


Share:

Elden Ring Night Reign Builds: 5 Overpowered Solo Setups


Introduction

If you're diving into Elden Ring: Night Reign and want to dominate without relying on co-op or summons, you're in the right place. This guide walks you through five of the best solo builds in Elden Ring Night Reign that are currently melting enemies and bosses alike. Whether you're all about fast-paced bleed damage, tanky frontliners, or explosive spell casting, there's a solo build here for you.

Each setup is designed for high effectiveness in solo play, using smart gear choices, optimized passives, and powerful strategies. From bleed stacking katana users to all-element spellcasters, you’ll find what works best for your play style.


Axe of Godrick Walder Build – AoE Mayhem for Close Combat Fans

The Axe of Godrick Walder build is made for players who love getting up close and blasting enemies with area-of-effect (AoE) damage. This setup shines when it comes to charged heavy attacks that deal damage to multiple targets at once.

Key Components:

  • Weapon: Axe of Godrick (ideal for AoE charged hits)

  • Shield: Great Turtle Shell (good mobility + solid defense)

  • Passive Perks: Boosts for charged attacks, jump attacks, and guard breaking

  • Spell: Golden Vow (temporary buff to offense and defense)

Strategy:

Use charged heavy attacks to trigger AoE bursts, especially when surrounded. Pair this with lightning-based consumables like Lightning Grease or Lightning Pots for added elemental damage. Stick to jump attacks for quick burst damage, and don’t forget to use the grappling hook for repositioning or starting fights.

Progression Tips:

  • Day 1: Farm nearby enemies and grab passives from Lightning or Fire settlements.

  • Day 2: Focus on weapon upgrades and hunt bosses like the Cariban Knights or dragons.

  • Day 3: Hit up merchants for Smithing Stones and consumables to prep for endgame.

Best For: Players who love clearing mobs fast and staying aggressive.


Blood Duchess Build – Max Out Bleed and Frostbite Damage

Looking for consistent burst damage with status effects? The Blood Duchess Build stacks bleed and frostbite for relentless damage. It revolves around the Duchess’s Restage ability, which re-applies recent damage for massive bursts.

Key Components:

  • Weapons: Dual Scavenger’s Curved Swords or Rivers of Blood + Frozen Needle

  • Talismans: Lord of Blood’s Exaltation, Green Turtle Talisman

  • Consumables: Bleed Grease, Freezing Grease

  • Spell: Golden Vow

Strategy:

Swap between bleed and frostbite to prevent enemies from resisting either effect. Trigger Restage right after inflicting a status proc to double your damage. This build rewards high-speed attacks and precision timing.

Progression Tips:

  • Day 1: Focus on grabbing early gear from blood or frostbite-themed zones.

  • Day 2: Upgrade weapons and go for world bosses for rare passives.

  • Day 3: Visit shops for critical materials like Smithing Stones.

Best For: Players who prefer fast, status-effect heavy gameplay.

Sacred Spear Guardian Build – Defense and Offense in Perfect Balance

This build is ideal for solo players who like to tank damage and strike back hard. With a spear and greatshield combo, the Sacred Spear Guardian Build is all about sustained pressure and counterplay.

Key Components:

  • Weapons: Magin Sacred Spear or alternatives like Blood Infusion Lance

  • Shield: Fingerprint Stone Shield

  • Talismans: Dragoncrest Shield Talisman, Curved Sword Talisman

  • Spell: Golden Vow

  • Consumables: Blood Grease


Strategy:

Use guard counters to punish enemy attacks. Keep your shield up and let enemies hit first, then follow up with heavy thrusts. The goal is to outlast and outdamage foes with perfect blocks and counter strikes.

Progression Tips:

  • Day 1: Level up fast by clearing nearby areas and gear up in Blood or Fire settlements.

  • Day 2: Upgrade weapons and track down ancient dragons or Kerrion Knights.

  • Day 3: Shop for items like Smithing Stones and prep for boss battles.

Best For: Players who want a durable frontline build that hits hard after defending well.


Elemental Recluse Build – All-Around Magic Domination

This build makes use of the Recluse’s hybrid casting abilities, letting you mix sorceries and incantations to dish out elemental damage of all kinds. If you want versatility and adaptability, the Elemental Recluse Build is your go-to.

Key Components:

  • Catalysts: Recluse Staff, Carian Glintblade Staff, Golden Order Seal

  • Spells: Catch Flame, Lightning Spear, Glintstone Pebble, Teodoxic Magma

  • Talismans: Graven-Mass Talisman, Godfrey Icon

  • Consumables: Starlight Shards

Strategy:

Build a custom magic loadout to suit the situation. Use fire spells for aggressive enemies, magic for general use, and lightning where needed. Manage FP using Starlight Shards, and prioritize charged spells for heavy damage.

Progression Tips:

  • Day 1: Farm XP and gather magic items from Fire and Lightning settlements.

  • Day 2: Hunt bosses for unique passives that boost magic performance.

  • Day 3: Shop for upgrades and level up for the final encounter.

Best For: Solo players who want a flexible spell-based setup with access to all elements.

Katana Executor Build – High-Speed Bleed and Counter Specialist

The Katana Executor Build is a top-tier solo option for players who favor quick melee strikes, high bleed buildup, and well-timed counters. It focuses on maximizing dexterity and arcane to fuel a relentless offense.

Key Components:

  • Weapons: Rivers of Blood, Nagakiba, or alternatives like Moonveil, Dragon Scale Blade

  • Talismans: Lord of Blood’s Exaltation, Shard of Alexander

  • Consumables: Blood Grease, Boiled Crab, Balucus

  • Passive Skill: Tenacity (boosts damage after recovering from a status)

Strategy:

Use fast katana attacks to inflict bleed quickly, then trigger Tenacity after recovering to increase your next wave of damage. Power-stancing katanas boosts output but demands tighter dodging. Keep healing items close to trigger Tenacity boosts during fights.

Progression Tips:

  • Day 1: Level up and find katana-type weapons from early-game zones.

  • Day 2: Target world bosses to unlock Tenacity-related passives and Ashes of War.

  • Day 3: Buy gear upgrades, boost dexterity and arcane, and prep for the final challenge.

Best For: Players who want a high-risk, high-reward melee playstyle with status effects and agile movement.


Conclusion: Dominate Elden Ring Night Reign With These Solo Builds

Whether you're casting spells, stacking bleed, or blocking everything with a massive shield, there's a solo build in Elden Ring Night Reign for every play style. These five builds not only maximize damage and survivability, but they also give you everything needed to conquer the game solo.

Take your time with each one, experiment with the suggested passives, weapons, and consumables, and you’ll find what works best for you. With the right strategy, any solo player can become unstoppable in Night Reign.

Frequently Asked Questions (FAQ)

Q1: What is the best solo build in Elden Ring: Night Reign?
A: It depends on your preferred playstyle. For aggressive melee players, the Katana Executor or Blood Duchess builds are ideal. If you prefer magic, the Elemental Recluse is a strong pick. For defense-focused players, the Sacred Spear Guardian build is a reliable choice.

Q2: Are solo builds viable in Elden Ring Night Reign?
A: Yes, all five builds listed are optimized for solo play. With the right setup and strategy, each build can handle the toughest enemies and bosses without needing co-op support.

Q3: What stats should I focus on for these builds?
A:

  • Katana Executor: Dexterity and Arcane

  • Blood Duchess: Dexterity and Endurance

  • Elemental Recluse: Intelligence and Faith

  • Sacred Spear Guardian: Strength and Vigor

  • Axe of Godrick: Strength and Endurance

Q4: Which weapons are best for solo players in Night Reign?
A: Top solo weapons include Rivers of Blood, Magin Sacred Spear, Axe of Godrick, and Recluse Staff. These offer strong damage scaling and unique effects suited for different combat styles.

Q5: What are the best passives to prioritize?
A: Look for passives like Improved Charged Attacks, Improved Guard Breaking, Improved Magic Power, and Tenacity, depending on the build you're using.


Share:

How to Beat Libra, Creature of Night in Elden Ring: Nightreign Boss Guide


Introduction: Facing the Equilibrious Beast

Libra, the Creature of Night, is one of the most challenging encounters in Elden Ring: Nightreign. Known for its balance-shifting mechanics and aggressive pressure, this Equilibrious Beast isn’t your average boss fight. Players who rush in without preparation often find themselves outmatched by its resource-draining abilities and relentless assault.

This guide breaks down the entire fight—from pre-fight preparation to the moment Libra falls—so you can overcome the darkness and push forward in Nightreign’s endgame. Whether you're struggling to survive Libra’s shield phase or unsure how to handle its chaotic energy bursts, we’ve got you covered.


Preparing for Libra: What You Need to Bring

Before jumping into the boss arena, make sure your build is ready for heavy attrition and magical pressure.

Key Preparation Tips:

  • Stock Up on FP Recovery Items: Libra drains FP aggressively. Bring extra flasks and mind-restoring consumables.

  • Use Incantations or Ranged Magic: While melee is viable, spells allow you to deal consistent damage from a safe distance.

  • Equip Damage Reduction Talismans: Magic and elemental resistance are crucial for surviving the fight.

  • Choose Fast Mobility Gear: You’ll need to dodge sudden AoEs and reposition quickly when Libra shifts its stance.


Phase One: Surviving the Initial Chaos

The fight opens with Libra using unpredictable movement and aggressive combos.

What to Expect:

  • Energy Siphon Attacks: Libra draws FP and stamina from your character—keep a close watch on your bars.

  • Teleportation and Vanishing: It disappears mid-combat and reappears close or far. Listen for audio cues before re-engagement.

  • Environmental Pressure: Hazes and burst zones appear across the arena. Don’t stand still for too long.

Best Strategy:

  • Use short casting windows to land ranged attacks.

  • Save stamina for dodges—Libra punishes greedy combos.

  • Don’t revive allies in open zones; wait for safe moments between teleportations.


Phase Two: Shield Phase and Rage Mode

At 50% health, Libra activates a magical shield and enters its rage state.

What Changes:

  • Shield Reflection: Damage is partially reflected. Avoid charging in.

  • New AoE Bursts: Timed energy rings appear—move outward, then back in.

  • Summon Waves: Libra may call forth lesser shades to support it.

Counter Strategy:

  • Bait the shield burst, then punish its cooldown.

  • Stick to ranged and stagger spells if possible.

  • Take out summons quickly—they don’t respawn.


Key Takeaways for Success

  • Libra drains resources fast—bring recovery items.

  • Stay mobile; teleport and AoE mechanics punish stationary players.

  • Wait out the shield phase; don't attack blindly.

  • Timing, patience, and positioning are more important than raw damage.


Conclusion: Conquering Libra, Creature of Night

Libra is not just another boss—it tests your awareness, stamina, and ability to adapt under pressure. The key to winning lies in preparation, patience, and learning its phases. Once you understand how it drains resources, vanishes, and enters shielded rage, you can counter each move confidently.

Make sure to bring FP-restoring items, equip gear with strong magical resistance, and don’t rush. Libra rewards calculated plays, and punishes those who go all in too early. With this guide in hand, you’re set to bring down the Equilibrious Beast and advance deeper into Elden Ring: Nightreign.


FAQs: Libra, Creature of Night Boss Fight

Q: Where do I find Libra, Creature of Night in Elden Ring: Nightreign?
A: Libra is located deep within the Twilight Nexus, a zone unlocked during the latter half of the Nightreign expansion.

Q: What’s the best weapon to use against Libra?
A: Fast-striking weapons or ranged spells are ideal. Libra punishes heavy, slow attacks, especially during its shield phase.

Q: Does Libra have any weaknesses?
A: Libra is slightly more vulnerable to Holy damage. Incantations or enchanted weapons with Holy effects can give you an edge.

Q: How do I counter Libra's resource-draining attacks?
A: Equip FP recovery talismans, use Mind stat-boosting items, and conserve FP by limiting excessive spell usage early in the fight.

Q: Is it better to solo or summon allies for this fight?
A: Allies help draw aggro, but Libra scales in difficulty with multiple players. Summon only if your team has solid coordination.

Q: What’s the biggest mistake players make during the fight?
A: Most players attack aggressively during the shield phase. Wait it out, then strike after Libra’s counter bursts are spent.


Share:

Hard Mode Challenges: Bellanoir Libero's Best Builds Against Bjorn & Bastigor


Understanding the Bellanoir Libero Build for Hard Mode

Taking on Bjorn and Bastigor in Hard Mode is no easy feat, but with the right Bellanoir Libero build, you can turn the tide. This guide covers how to maximize damage output while managing survivability—without relying on the Vampiric skill. Whether you're testing Rock Burst or leaning into Nightmare Bloom, this breakdown helps you stay competitive and survive those punishing boss attacks.

Instead of the usual Vampiric build, we’re focusing on a Ferocious Bellanoir Libero setup. It's all about pushing raw attack power higher while giving up the self-healing that Vampiric normally provides. This forces more strategic play—positioning, aggro management, and a deeper understanding of your pal’s role during boss fights.

Choosing Ferocious Over Vampiric: A Trade-Off for More Power

Running Bellanoir Libero with Ferocious instead of Vampiric means shifting from sustainability to offense. Normally, Vampiric adds substantial healing by converting damage into health, especially when the player and pal are actively attacking. In tower boss fights, that added healing—up to around 17,000 HP—is critical for reducing the need to dodge or micromanage health items.

But in this approach, without Vampiric, the healing buffer is gone. Instead, you'll rely on manual healing with potions and smarter positioning. Ferocious gives Libero a more aggressive edge, ideal if you're confident with your dodging skills and want faster boss clears. It also means you need to play a more active role in holding aggro and managing damage.

Managing Aggro Without Vampiric: Your Role as a Player

When your Libero isn't absorbing hits for you, holding aggro becomes your job. If Libero deals too much damage too fast, bosses like Bjorn may shift focus to her. That’s why, at the start of the fight, it's crucial to immediately open with strong ranged attacks—like missiles or rockets—to establish dominance and keep the boss fixated on you.

This approach limits how much danger your Libero is exposed to. Skills like Rock Burst or Air Blade are powerful, but they bring Libero too close to bosses who have dangerous area-of-effect moves. To balance this, you’ll need to constantly monitor her position and adjust where you stand to keep her safe but still effective.

Combat Positioning: Keeping Libero Safe Without Losing DPS

Without Vampiric, Libero's survival hinges on your awareness. One wrong placement and she’ll take splash or AoE damage from Bjorn’s attacks like Hydro Lasers or Glacial Impact. The key is keeping her positioned between you and the boss, so the enemy is more likely to target you instead.

This also opens up opportunities for indirect damage, where bosses run into Libero’s Rock Burst or Air Blade effects while chasing you. However, mispositioning can lead to her getting clipped by multi-hit skills or environmental hazards. Using a healing potion early and strategically can help offset any accidental hits, giving Libero a better shot at staying in the fight longer.


Skill Combo Strategy: Rock Burst, Air Blade & Flame Funnel

For players choosing the Rock Burst build, execution matters more than gear. This combo—Rock Burst, Air Blade, and Flame Funnel—has a high DPS ceiling but requires good timing and spacing. You’ll want Libero close enough to land Rock Burst consistently, but not so close that she gets hit with every boss skill.

At the same time, you're balancing your own damage to maintain aggro. If Libero deals more damage too fast, she’ll draw unwanted attention. That’s why using high-damage opening attacks—before Libero fully ramps up—helps you stay in control. While this playstyle is more hands-on, it rewards tight coordination with faster boss takedowns when executed well.

Rock Burst Build vs. Nightmare Bloom Build: Two Strong Paths

While the Rock Burst + Air Blade combo is all about high impact and quick bursts of damage, it demands precise timing and close-range positioning. In contrast, the Nightmare Bloom build offers a more relaxed playstyle with a wider attack range and less need for micromanaging Libero’s location.

Nightmare Bloom’s strength lies in its exclusive synergy with Libero, allowing her to teleport and cast powerful damage-dealing attacks from a distance. This not only keeps her safer from AoE damage but also reduces your need to manually dodge or reposition constantly. It’s an easier build to execute, especially for players who prefer a long-range strategy.

Best Skills for Nightmare Bloom Libero Build

For the Nightmare Bloom build, Thunderstorm and Flame Funnel round out a solid trio. Nightmare Bloom opens the fight with heavy damage, followed by Flame Funnel’s consistent pressure. While Wall Splash is a strong choice on paper, it interacts poorly with Flame Funnel by reducing its damage when enemies are soaked—so it's best avoided in this combo.

This build capitalizes on Libero’s ability to deal heavy ranged damage early in the fight. However, be aware that if you aren't doing enough damage as a player, you might lose aggro, making it harder to control the flow of battle. Still, it’s a powerful setup, especially in encounters where repositioning is tough or you want to reduce the risk of Libero taking damage.

Legendary Gear and Player Contribution: Why It Matters

Your effectiveness in either build depends heavily on your player damage output and gear quality. With legendary weapons, your character can maintain aggro longer and give Libero the space she needs to operate safely. If you're undergeared, though, Libero might accidentally pull aggro—especially in Rock Burst builds—leading to chaotic, damage-heavy exchanges.

This is one reason Vampiric builds are often recommended for newer or under-equipped players. But if you're in the late game and armed with maxed-out gear, you can afford to take more control of the fight. This lets you move away from passive healing and toward builds that maximize raw DPS and shorten the encounter.

Boss Behavior: Understanding Bjorn and Bastigor Patterns

Both Bjorn and Bastigor have patterns that punish poor positioning. Bjorn’s Hydro Lasers and Glacial Impact hit wide areas, and Bastigor uses aggressive jumps and close-range swipes. These moves can easily clip Libero if she’s too close, particularly in Rock Burst setups.

That’s why reactive dodging and preemptive placement are critical. You’ll need to anticipate attack windows, reposition Libero between casts, and manage both your damage and healing windows. Nightmare Bloom builds sidestep a lot of this by letting Libero act from a distance, but the Rock Burst combo demands sharp awareness to avoid setbacks.

Performance Comparison: Execution vs. Simplicity

Choosing the best Bellanoir Libero build depends on your priorities—raw damage or ease of execution. The Rock Burst build, when used correctly, can deal massive DPS, often outperforming other setups in speed. However, it comes with high risk: missteps mean more healing, dodging, or even restarts due to Libero’s early KO.

In contrast, the Nightmare Bloom build is more forgiving. It’s simpler to maintain, less prone to error, and keeps Libero safer throughout the fight. While it may not top the DPS charts against Bjorn and Bastigor, its reliability makes it a strong contender, especially when combined with legendary gear.

When to Choose Each Build

Use the Rock Burst build if:

  • You have strong gear and high personal damage output

  • You’re confident in micromanaging aggro and positioning

  • You want the fastest boss clears possible

Go with the Nightmare Bloom setup if:

  • You want a safer, long-range strategy

  • You prefer passive positioning with less micromanagement

  • You’re running bosses with unpredictable movement or large AoEs

Each build has a place depending on your team composition, playstyle, and boss mechanics. It’s not just about what’s “best”—it’s about what works best for you.


Final Thoughts: Choosing the Right Bellanoir Libero Build

Taking down Bjorn and Bastigor on Hard Mode in Palworld requires more than raw strength—you need a strategy tailored to your setup. Whether you choose the high-risk, high-reward Rock Burst + Air Blade combo or the safer, ranged Nightmare Bloom build, the key is aligning your playstyle with Libero’s strengths.

Without Vampiric, Ferocious gives you a clear offensive edge, but demands better aggro management, positioning, and personal DPS. Nightmare Bloom builds ease that pressure, giving you more room to focus on survival and long-range impact. No matter which path you pick, understanding boss mechanics, staying aware of aggro, and optimizing gear will determine your success.


Frequently Asked Questions (FAQ)

Q: Is Vampiric still worth using on Bellanoir Libero?
A: Yes, especially for newer players or those with less powerful gear. It adds a major survivability layer by healing Libero as she deals damage. However, advanced players can drop it for Ferocious to increase raw DPS.

Q: Which build is easier to manage—Rock Burst or Nightmare Bloom?
A: Nightmare Bloom is easier. It allows Libero to attack from a distance, reducing risk and micromanagement. Rock Burst requires closer range and tighter positioning, but offers higher DPS.

Q: Can I run Rock Burst without legendary gear?
A: Technically yes, but it’s harder. Without strong gear, your character might not maintain aggro effectively, causing Libero to draw unwanted attention and take more damage.

Q: Why does Flame Funnel not work well with Wall Splash?
A: Wall Splash soaks the enemy, which reduces the damage output of Flame Funnel. If you're using Flame Funnel, it's better to skip Wall Splash to maintain DPS.

Q: What’s the main difference between builds with and without Vampiric?
A: Vampiric builds focus on self-sustain and tanking longer fights. Builds without Vampiric rely more on positioning, player DPS, and healing items but can finish fights faster with higher output.


Share:

Haplo Gaming Chef

Haplo Gaming Chef
The Chronicles Of Haplo

Pageviews past week

Games

Guide Archive

Contact The Haplo Gaming Chef

Name

Email *

Message *