window.dataLayer = window.dataLayer || []; function gtag(){dataLayer.push(arguments);} gtag('js', new Date()); gtag('config', 'G-MMHBH52X9K');

World of Warcraft 11.1.5: Feral Druid DPS Shines in Mythic+


World of Warcraft's 11.1.5 update has brought a noticeable shift in the DPS meta, and one spec is gaining serious traction in Mythic+ dungeons — the Feral Druid. Once an underdog, Feral is now climbing the ranks and establishing itself as a solid S Tier DPS pick. Thanks to a mix of consistent AoE output, solid utility, and scaling power, this melee spec is finding a new place in the spotlight. Whether you're returning to the game or planning to reroll, there's plenty to learn about why Feral is thriving right now.

What Changed in Patch 11.1.5 for Feral Druids?

In Patch 11.1.5, not much changed directly for Feral Druids, but the environment around them shifted in their favor. Previous top-tier specs like Enhancement Shaman received nerfs, and as more players gained high-level gear, Feral's strengths became more visible. On the Public Test Realm (PTR), Feral was already outperforming others in sustained damage, and those numbers are now showing up in live servers, especially in high Mythic+ keys.

The big news isn’t a rework or new mechanic — it’s that Feral Druid damage scales extremely well with gear. As players move toward item level 670+, the raw output from bleed effects and uncapped AoE starts to outpace more burst-oriented specs that relied on front-loaded abilities or cooldowns.


The Real Strength: Feral Druid’s Damage Profile

Feral’s damage isn't flashy, but it's reliable and ramping. Instead of spiking damage in short bursts, Feral Druids apply pressure over time through bleeds like Rip and Rake, with talents and procs like Apex Predator's Craving pushing their priority damage potential even higher.

  • Uncapped AoE makes a big difference in large trash pulls — a defining trait of many Season 2 dungeons.

  • Apex Predator procs give feral a burst window when needed, especially when cleaving on high-health mobs or nuking down key targets.

  • Bleed-based DPS means consistent output across fights, regardless of cooldown availability or RNG spikes.

This consistency becomes a huge asset in keys where execution matters more than variance.


Why Feral Druids Excel in High-Level Mythic+

In the current Mythic+ landscape, dungeons favor large pulls and tight timers. That plays directly into Feral Druid’s hands. Unlike many melee specs that struggle in AoE-heavy environments, Feral thrives when packs are large and the tank can group mobs efficiently. Their damage doesn't fall off when there are more targets — it actually ramps up.

In addition, the longer fights in high keys give Feral time to apply bleeds to multiple enemies and maintain uptime. Short fights can limit their full damage potential, but high-key dungeons rarely fall into that trap. Instead, fights go long enough to showcase Feral's full rotation strength.

Key Performance Highlights:

  • Strong in keys 17 and up, as seen in logs and runs from top players.

  • Outpaces specs like Balance Druid or Unholy DK in longer pulls due to stable damage.

  • Ideal for dungeons like Cinderbrew Meadery or Algeth’ar Academy, where uncapped AoE is fully utilized.


When Feral Isn’t the Best Choice

Feral isn’t invincible — in lower key runs or small-pull dungeons like Theater of Pain, they may not shine as brightly. Their damage relies on ramp time, and if mobs die too fast, bleeds never get their full value. Specs with burst AoE like Havoc Demon Hunter or Ret Paladin will outshine Feral in fast-paced or under-tuned content.

Also, Feral doesn’t bring high-impact group buffs like Bloodlust or major DPS cooldowns that affect the group. While they do offer strong personal output and decent utility, there are cases where a comp might prefer a spec with more group synergy or faster burst potential.

Summary:

  • Not ideal for short fights or trash that melts quickly.

  • Less impactful in 10–13 keys where pull sizes and fight durations are smaller.

  • Competes better in structured, high-end play than casual PUG runs.


Feral Druid Utility in Mythic+ Runs

Beyond pure damage, Feral brings a well-rounded toolkit of utility that fits well in today’s Mythic+ ecosystem. While not as utility-heavy as some ranged specs, they still offer several powerful tools:

  • Incapacitating Roar is great for interrupting multi-casts, especially in high-pressure pulls like Rookery or Spire.

  • Soothe, Remove Corruption, and Innervate remain strong cross-spec Druid utilities, adding dispel, decurse, and mana support for healers.

  • Typhoon or Ursol’s Vortex can provide crowd control when paired with dungeon mechanics that favor mob movement or kiting.

Since Feral is already in melee range, they can apply utility without needing risky repositioning, unlike Balance Druids or other ranged DPS.


Feral Druid Survivability vs. Other Specs

Another factor helping Feral Druid succeed in this patch is improved defensive capability. While Feral has often been viewed as a squishy spec, Patch 11.1.5 and the current talent meta make it much more durable than in past seasons.

Key defensive tools include:

  • Survival Instincts: A strong personal cooldown that greatly reduces incoming damage.

  • Improved Bear Form: Retains part of its armor and stamina bonus even after shifting out.

  • Frenzied Regeneration (via hybrid talent picks): Can be used in emergencies even in Cat Form.

While Feral won’t out-tank a Death Knight or Paladin, it's notably tankier than Shaman or Balance Druid, especially in melee-heavy environments.


How Apex Predator’s Craving Enhances Priority Damage

A major part of Feral Druid’s competitive edge in Mythic+ lies in the Apex Predator’s Craving talent. This ability gives Feral Druids a chance to trigger free and empowered Ferocious Bites from Rip damage ticks. In larger pulls, this chance increases significantly due to more enemies bleeding simultaneously.

This mechanic translates into:

  • High priority target damage during AoE pulls.

  • A stable and consistent damage profile compared to RNG-heavy specs like Unholy DK or Elemental Shaman.

  • Better control over when burst happens, since Ferals can plan around Apex procs.

For example, during fights with a key mob or mini-boss among trash packs (such as Hired Muscle in Priory), Ferals can nuke that enemy without sacrificing AoE pressure.


Physical vs. Magic Damage Meta in Season 3

Another contributing factor to Feral’s rise in 11.1.5 is the evolution of the damage-type meta. This season, teams are starting to build around either:

  • A magic-focused comp (with Demon Hunters, Balance Druids, Mages), or

  • A physical-focused comp (Monk + Warrior + physical DPS specs like Feral, Rogue, and Hunter).

Feral fits perfectly in the physical comp due to:

  • Synergy with Mystic Touch (Monk debuff that increases physical damage taken).

  • Boosted output when paired with Battle Shout (Warrior buff).

  • Natural alignment with melee cleave playstyles.

While the magic comp remains strong overall, physical setups are now only 1–2 keys behind in performance, giving Feral a real chance to shine in diverse group compositions.


Where Feral Fits in the Current DPS Rankings

If you look at the current WoW 11.1.5 DPS rankings on sites like Archon.gg or WarcraftLogs, you’ll see Feral Druid performing exceptionally well, especially in high key Mythic+ dungeons. While it’s not topping every chart, Feral consistently ranks in S Tier or high A Tier among melee specs.

What separates Feral from other specs is its balance across various damage types — solid AoE, strong cleave, and reliable single-target performance. The spec doesn’t rely on burst windows or group buffs as much as others, which makes it:

  • Easier to plug into diverse comp setups.

  • A stable choice in coordinated and PUG groups alike.

  • A sleeper pick that’s finally getting the attention it deserves.


Comparing Feral to Boomkin (Balance Druid)

No Feral discussion is complete without the classic comparison: Feral vs. Balance Druid. In previous metas, Balance was the easy choice for ranged damage, with Starfall and Celestial Alignment dominating AoE encounters. But the 11.1.5 patch created more room for spec diversity, and Feral is now holding its ground.

Key comparison points:

  • Mobility: Feral wins. Balance needs to reposition often and loses DPS doing so.

  • Priority damage: Feral pulls ahead, especially with Apex procs during big packs.

  • Utility: Both specs share Druid toolkit, but Feral applies it without leaving melee range.

  • Survivability: Feral now has better tankiness thanks to defensive talents and Bear Form enhancements.

While Balance still fits certain team comps better, Feral is no longer the second-tier choice — it’s a viable primary DPS depending on dungeon and group strategy.


Conclusion: Is Feral Druid Worth Playing in WoW 11.1.5?

Right now, Feral Druid is one of the strongest melee DPS options for players pushing Mythic+ in World of Warcraft Patch 11.1.5. With a combination of uncapped AoE, priority target burst, and consistent bleed-based output, Feral performs exceptionally well in high-level dungeons.

It’s not the most beginner-friendly spec and does require ramp time and proper pull planning, but for players who commit to learning the rotation and optimizing their build, the rewards are clear. Add to that solid defensive tools, baseline Druid utility, and synergy in physical-damage comps, and you have a spec that’s finally getting the recognition it deserves.

Whether you’re a longtime Feral main or just considering trying it for the first time, now is an excellent time to bring this spec into your Mythic+ rotation.


Frequently Asked Questions (FAQ)

Q: Is Feral Druid viable for high Mythic+ keys in 11.1.5?
A: Yes. Feral Druid is performing well in high keys (17+), especially in dungeons that favor big AoE pulls and sustained fights.

Q: How does Feral Druid compare to Balance Druid?
A: Feral offers stronger priority damage, more consistent output, and better survivability in melee. Balance has stronger ranged burst and utility but struggles with movement-heavy encounters.

Q: What makes Feral Druid strong in this patch?
A: Key factors include uncapped AoE, reliable damage scaling with gear, Apex Predator procs for priority targets, and compatibility with the physical damage meta.

Q: Is Feral beginner-friendly for Mythic+?
A: It has a steeper learning curve due to ramp time and bleed management, but it's highly rewarding once mastered.

Q: Which dungeons are best for Feral Druids in 11.1.5?
A: Dungeons with large trash pulls like Cinderbrew Meadery, Algeth’ar Academy, and Priory showcase Feral’s uncapped AoE strengths.

Share:

How to Beat Gaping Jaw in Elden Ring Nightreign (Solo & Co-op Guide)


 Introduction: Understanding the Gaping Jaw Challenge

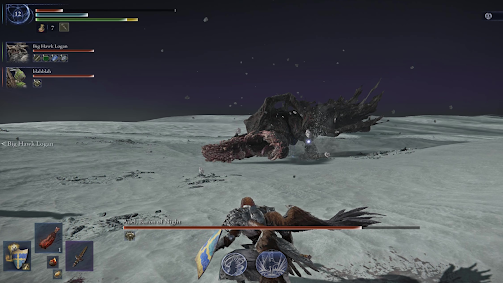
Facing Gaping Jaw—also known as Adele, Baron of Night—in Elden Ring: Nightreign can be intense, especially for first-timers. Whether you're tackling it solo or with friends, this guide breaks down everything you need: builds, roles, relics, and attack strategies. Spoiler: the boss is weak to poison, and that’s where the Iron Eye comes in. We’ll walk through both solo and three-player strategies, with tips for relic optimization, character roles, and avoiding deadly grabs.


Best Roles for Co-op: Build a Balanced Team

For those diving in with a full team of three, here's the ideal setup:

  • One Iron Eye user: This is crucial for inflicting poison and staggering the boss.

  • Two tanks: Choose characters like Wilder or Raider. Their high HP and stance resistance make them ideal to hold aggro.

Quick Tips:

  • Tanks should focus on health and poise.

  • Only the Iron Eye needs poison-based attacks.

  • DPS roles should emphasize stance-breaking weapons and spells.


Solo Strategy: How to Carry the Fight Alone

Yes, Gaping Jaw is totally beatable solo—and arguably easier. Your main weapon? A poison-enhanced Iron Eye setup.

Key Solo Tools:

  • Poison Relics: Begin the fight with armaments that inflict poison early.

  • Triangle + L2 Skill (Character Ability): Grants invulnerability frames—use it when dodging grabs or AoE gravity attacks.

  • Ranged Poison Damage: Use a starter bow (preferably purple-tier) with poison arrows to keep up consistent pressure.


Rotation Summary
:

  1. Apply poison quickly.

  2. Create distance once the boss starts vomiting.

  3. Use passive ranged damage until he repositions.

  4. Dodge using your L2 skill or jump during AoE.


Iron Eye Build Essentials: What You Need

If you're playing as Iron Eye, make sure your character is set up right. This build is viable for both solo and co-op play:

  • Starter Bow (Purple) – Enhanced with Smithing Stone I and II

  • Poison Armament Relics – Ideally triggered from the beginning

  • Stance-Damage Addons – Prioritize skills that boost poise break

Why Iron Eye Works:

  • High poise damage.

  • Easy poison application.

  • Great synergy with stagger mechanics.

Pro Tip: Marking the boss with Triangle + L2 increases your chance to stagger. Stack this with poison ticks for high disruption.


Boss Phases and Patterns: What to Watch For

Phase 1: Standard Attacks

  • Mostly melee-based with a grab move.

  • Use triangle + L2 to dodge when it lunges or grabs.

Phase 2: Gravity Zone

  • Purple gravity zones appear—move out fast.

  • Avoid getting trapped. Jump or reposition using character skill.

Stagger Windows:

  • The boss becomes vulnerable when poisoned (starts vomiting).

  • Hit hard during this window, but maintain distance if solo.


Multiplayer Tips: Support and Damage Roles

If you're not Iron Eye or a tank, here's how to contribute effectively:

  • Recluse or Revenant Players: Summon familiars like Pumpkin Head or Frederick to grab attention.

  • Pyro and Magic Users: Stay at range and unload damage during stagger or puke phases.

  • Positioning: Keep mages and casters behind tanks—no need to kite if the boss is focused elsewhere.

Tip: Always communicate with tanks to stay alive and maintain positioning. Let them hold aggro while you deliver DPS safely.


How to Mark and Stagger Gaping Jaw

To increase stagger rate:

  • Always hit the boss with your marking ability (Triangle + L2 for Iron Eye).

  • Stack it with ranged poison arrows.

  • Switch between bow and melee only when the boss is vomiting.

Reminder: Marking = More staggers = More opportunities to deal big damage.


Best Relics and How to Farm Them

You can’t “grind” for specific relics directly, but there are ways to improve your odds:

  • Failing on Day 3 increases your chance of obtaining high-tier relics.

  • Don’t worry if you’re losing fights—you’ll still be rewarded with progression-based items.

Tip: Play consistently, aim to survive until Day 3 or 4 each run, and keep your Iron Eye setup flexible for relic changes.


Advanced Strategy: Managing Aggro and Support

If you’re the Tank:

  • Focus purely on HP and poise resistance.

  • Do not worry about poison. Let Iron Eye handle that.

  • Use taunt or high-threat attacks to keep the boss on you.

If you’re Support:

  • Stack healing or buffing relics.

  • Focus on revives and ranged disruption (magic or fire).

  • Stick close to the edge of combat zones.


Conclusion: Boss Beat Down Recap

Gaping Jaw in Elden Ring Nightreign might look intimidating, but with the right strategy, it’s one of the easier late bosses to manage—especially if you understand the poison and stagger mechanics.

Key Takeaways:

  • Iron Eye build is the core to any easy clear strategy.

  • Poison application creates huge openings.

  • Use triangle + L2 marking skill to stagger fast.

  • In co-op, tanks keep aggro while DPS dishes it out from range.

  • Keep your relics upgraded and focus on poison synergy.


Frequently Asked Questions (FAQ)

Q1: What is the easiest way to defeat Gaping Jaw in Elden Ring Nightreign?
The easiest method is using a poison-focused Iron Eye build. Applying poison causes Gaping Jaw to vomit, creating a damage window. Use ranged poison weapons and triangle + L2 marking skills to stack poise damage and trigger staggers.

Q2: Can I defeat Gaping Jaw solo, or do I need a team?
Yes, soloing Gaping Jaw is very possible and often easier. A properly built Iron Eye with poison relics and good timing can control the fight efficiently. Maintain distance and focus on passive damage.

Q3: What build works best for multiplayer runs?
In co-op, one player should run Iron Eye with poison, and the others should play tank roles like Wilder or Raider. Support characters like Recluse or Revenant can contribute from range using summons or spells.

Q4: What relics are recommended for this boss fight?
Relics that apply poison from the start are ideal. Focus on those that boost poise damage, mark targets, or enhance ranged attacks. These effects help you stagger the boss faster and maintain control.

Q5: How do I avoid the boss's gravity attacks in Phase 2?
Watch for purple energy forming under your character. Immediately reposition using your character skill (triangle + L2) or jump out of the area to avoid incoming damage from falling rocks or grabs.

Q6: Is there a way to farm relics for Iron Eye?
There's no guaranteed relic farming method, but failing on Day 3 increases your chance of earning high-quality relics. Keep playing and experimenting with setups, as progression rewards better loot over time.

Q7: Why does the boss start vomiting during the fight?
The boss vomits after taking a certain amount of poison damage. This is a core mechanic of the fight that you should take advantage of—it interrupts attacks and creates a window for damage dealing.

Q8: Can I use other builds besides Iron Eye to win?
Yes, but Iron Eye offers the best balance of poison access and stance-breaking power. Other builds require more coordination or risk. If you go with another setup, ensure your team includes high HP tanks and ranged support.

Q9: What does the triangle + L2 skill do exactly?
This character skill grants invulnerability frames, lets you mark enemies (increasing stagger chance), and can be used to escape boss grabs or AoE zones. It's essential for both offense and defense.

Q10: How do I join co-op teams for Nightreign?
Check community Discords or forums and include your platform (PC, PlayStation, etc.). Be clear about your build and role (tank, Iron Eye, support) when looking for teammates.


Share:

Top Tips to Master the Duchess in Elden Ring: Night Reign


Introduction

The Duchess is one of the fastest and most powerful characters in Elden Ring: Night Reign. Known for her high dexterity and low stamina costs, she enables fast-paced gameplay that rewards aggressive strategies and quick decision-making. Whether you prefer solo expeditions or want to carry your team, understanding how to use her skills effectively can make all the difference.

In this guide, you’ll learn how to fully leverage her passive ability, make the most of her unique skill set, choose the right weapons, and avoid common mistakes. If you want to dominate the battlefield with the Duchess, this strategy guide is for you.

SEO Keywords used: Duchess Elden Ring Night Reign, Elden Ring Duchess guide, high dexterity characters Elden Ring


Understanding the Duchess's Passive Ability: Magnificent Poise

The Duchess’s passive ability, Magnificent Poise, is central to her playstyle. It allows you to dodge and attack more efficiently by minimizing stamina consumption. You can chain up to two consecutive evasive moves, which gives you an edge in fast-paced combat. This passive also boosts her survivability, especially when facing heavy-hitting enemies.

What makes this ability stand out is how quickly you can move. Even in high-pressure scenarios, her dodge animations—like backflips and low ducking rolls—let you evade 80% to 90% of incoming attacks. Her mobility makes her ideal for players who favor aggressive, in-and-out play styles.


Best Weapons for the Duchess

The Duchess shines when equipped with fast weapons that scale with dexterity. Dual daggers, fists, and curved swords work particularly well. These weapons complement her ability to move quickly while dishing out consistent damage.

  • Dual Daggers: Ideal for building up status effects like poison, rot, bleed, or frost. Mix and match different elemental effects to keep enemies under pressure.

  • Curved Swords: Offer a balanced option with slightly more range, useful when you need to kite or reposition during fights.

  • Bows: Though not her primary strength, bows work well as a ranged alternative due to her high dexterity scaling.

🔑 Key Takeaways:

  • Focus on fast, dexterity-scaling weapons.

  • Combine status effects to maximize damage over time.

  • Avoid heavy weapons that slow down your attack chain.


Mastering the Restage Skill

The Duchess’s character skill, Restage, is a game-changer. When activated, it replays all damage dealt to nearby enemies over the past few seconds. You’ll see ghostly phantoms appear, absorbing the damage your team has recently inflicted. This damage is then transferred to the real enemies, essentially doubling the impact.

Restage can be used anytime—even mid-attack, during a dodge, or when knocked down. It also reapplies status effects like poison and bleed. This makes it ideal for teams that rely on stacking elemental effects. Because of its short cooldown, don’t wait for the perfect moment—use it frequently to keep the pressure on.


When to Use Restage for Maximum Impact

While some players hold Restage until their teammates unleash ultimates, this often leads to missed opportunities. Instead, activate it immediately after seeing a decent chunk of enemy health drop. Frequent use ensures consistent bonus damage and helps maintain momentum in boss fights.

Another benefit: Restage reapplies poise damage, making it easier to break an enemy’s stance. If timed well, you can interrupt powerful enemy attacks or create openings for critical hits.

🔑 Key Takeaways:

  • Use Restage as often as possible—it’s your main damage multiplier.

  • Works great with poison, rot, bleed, and frost builds.

  • Helps stun enemies by reapplying poise damage.


How to Use Finale the Right Way

Finale, the Duchess’s ultimate art, cloaks her and nearby allies in shadow, making them invisible to enemies. While this sounds powerful, it’s not always best used offensively. In fights against Night Lords or enemies with wide-area attacks, using Finale can actually backfire. Bosses will often react with random AoE attacks, making it harder for your team to read and counter their moves.

Instead, Finale shines as a defensive and support ability. Use it to reposition, revive teammates, or heal up without drawing enemy attention. As long as you avoid triggering enemy aggression by staying hidden and not attacking, Finale gives your team breathing room.


Best Situations to Use Finale

When you’re not running with a Revenant or Iron Eye, the Duchess becomes your primary support. That makes smart use of Finale even more important. Here are key moments when using Finale makes sense:

  • Reviving fallen teammates

  • Retreating to heal

  • Setting up a safer repositioning

  • Sneaking behind minor enemies for backstabs

While it has limited offensive use in boss fights, Finale is excellent for regaining control of chaotic situations. Think of it as a reset button for your team—not a damage tool.

🔑 Key Takeaways:

  • Use Finale to support your team, not for direct offense.

  • Great for revives and regrouping.

  • Avoid using it against AoE-heavy bosses unless absolutely necessary.


Ideal Playstyle for the Duchess

To play the Duchess effectively, lean into her high agility and dexterity scaling. She thrives on quick decision-making and constant movement. Instead of standing toe-to-toe with enemies, use her mobility to dart around, land precise hits, and reset positioning.

Fast weapons like daggers and curved swords let you stay active without leaving long recovery windows. Combine that with short, repeatable dodges, and you’ll be able to weave in and out of danger almost effortlessly. If you’re accurate with your timing, you’ll rarely need to rely on healing since you'll barely get hit.


Weapon Combos and Status Effect Stacking

The Duchess excels at building up status effects quickly. Consider these weapon setups for optimal synergy:

  • Poison + Rot Daggers: Applies two different damage-over-time effects, forcing enemies to burn through their health.

  • Bleed + Frost Mix: Causes health burst from bleed and slows enemies with frost buildup—excellent for boss fights.

  • Legendary Starter Weapon + Relics: Use relics to add status effects to your base weapon. In areas like Crater Shifting Earth, upgrade these weapons early for a massive boost.

With the right relics and dual-weapon combos, you’ll constantly apply pressure while maintaining mobility. This makes her not only hard to hit but also incredibly deadly over time.

🔑 Key Takeaways:

  • Build around weapons that stack poison, rot, bleed, or frost.

  • Upgrade your starter weapon in Crater Shifting Earth.

  • Stay nimble, apply effects quickly, and keep moving.


Common Mistakes to Avoid with the Duchess

While the Duchess is strong, misusing her tools can weaken your performance. Here are some frequent mistakes and how to avoid them:

  • Saving Restage too long: Waiting for the “perfect moment” often results in missing out on consistent damage. Use it regularly.

  • Treating Finale like an offensive tool: It’s mainly a defensive ability. Don’t try to use it to attack big bosses unless the timing is absolutely safe.

  • Using slow weapons: Weapons with long animations don’t complement her speed-focused style. Avoid greatswords or other heavy gear.

  • Ignoring poise mechanics: Many players overlook that Restage reapplies poise damage—use this to stagger enemies often.


Final Tips for Dominating with the Duchess

To truly maximize her potential, keep these final strategies in mind:

  • Always stay on the move—never trade hits.

  • Pair her with teammates who deal burst damage; Restage will amplify their output.

  • Invest in relics that enhance status effects or increase stamina regeneration.

  • Learn enemy attack patterns to improve your dodge timing and offensive windows.

With practice, the Duchess becomes one of the most powerful and reliable picks in Elden Ring: Night Reign. She’s agile, deadly, and versatile in both solo and team settings.

🔑 Key Takeaways:

  • Stick with fast weapons and rapid positioning.

  • Sync Restage with team damage output.

  • Use Finale to support, not to engage.


Share:

Best Recluse Build in Elden Ring Nightreign – 2025 Ultimate Guide


Introduction

The Recluse class in Elden Ring: Nightreign delivers one of the safest and most damage-focused playstyles available in the game. With strong FP sustain, smart spellcasting, and passive healing mechanics, the Recluse excels at surviving while dishing out serious damage. This guide covers everything you need: from the best relics and skills to optimal spells, weapons, and special effects. Whether you're gearing up for Night One or prepping for endgame bosses, this build is structured to give you a consistent edge.


Best Relics for Recluse Build

The Recluse class heavily relies on relics that enhance intelligence, FP management, and survivability.

  • Grand Tranquil Scene

    • +2 Mind, +2 Intelligence

    • Boosts art activation damage

    • Excellent for solving FP limitations early

  • Bone-like Stone

    • +3 Intelligence

    • Complements spell power scaling

  • Knight of the Wise

    • Increases maximum FP significantly

    • A must-have for extended combat and casting

  • Recluser’s Chalice

    • Earned via the Recluse remembrance quest

    • Provides synergy with passive abilities

Tip: Prioritize the Recluse’s Remembrance quest early to secure these relics quickly.


Recluse Skills Breakdown

Understanding the Recluse's passive and active skills is critical for maximizing this class’s strengths.

  • Passive Ability: Elemental Defense

    • Automatically absorbs elemental energy during combat

    • Enables buildup of elemental affinity residue for spellcasting

  • Active Skill: Magic Cocktail

    • Replenishes FP when used on marked enemies or allies

    • After collecting three elemental residues, you cast a matching affinity spell

  • Ultimate Art: Soul Blood Song

    • Marks enemies with blood sigils (lasts ~10 seconds)

    • Allies gain HP and FP when attacking marked targets

Tip: Use Soul Blood Song right before high-intensity fights to sustain your team and outlast enemies.


Top Spell Choices for Recluse

Effective spell selection is crucial for maintaining pressure and avoiding vulnerability.

  • Ranala’s Full Moon

    • High-damage AoE spell

    • Ideal when paired with legendary staffs

  • Dragon Fire

    • Strong area spell with high burn damage

    • Vulnerable casting window—use only when safe

  • Stars of Ruin

    • Fast-casting, homing projectile

    • Extremely efficient against both mobs and bosses

  • Other Recommendations:

    • Prioritize fast, low-cast-time sorceries

    • Avoid spells with long windups that leave you exposed

Pair “Stars of Ruin” with relics or gear that regenerate FP on hit—this combination is extremely effective.


Weapon Selection Strategy

You're not limited to staff type weapons. Instead, focus on what bonuses and spells a weapon offers.

  • Use staffs that come bundled with useful sorceries

  • Prefer legendary-grade staffs for bonus scaling

  • Keep a variety of weapons with useful passive skills in your inventory

Even if a weapon is not equipped, its passive bonus still activates—be sure to read every weapon description carefully and fill out your inventory slots accordingly.


Optimizing Special Effects for Recluse

The Recluse thrives on passive support effects that enhance its fragile but powerful nature.

Recommended Special Effects:

  • FP regeneration over time

  • Reduced FP cost for sorceries

  • HP recovery on successful hits

  • Increased flask effectiveness

  • Lower chance to be targeted by enemies

  • Bonus to spell and incantation damage

  • Additional rune drops from enemies

“Less Likely to be Targeted” is especially important since Recluse has low defense.


Leveling Advice and Key Progression Tips

Early Game Checklist:

  • Complete the Recluse remembrance quest for Chalice and relic access

  • Collect flask upgrades from church ruins

  • Focus attribute points on Intelligence and Mind

Recommended Levels:

  • Before Night One: Level 7–8

  • Before Night Two: Level 11–12

Decision Making:

  • Take your time choosing rewards after bosses

  • Some choices have a long-term impact on your build's efficiency

Make sure to keep your FP economy sustainable before tougher boss phases.


Conclusion

The Recluse class in Elden Ring: Nightreign isn’t just fun—it’s built for domination. With the right relics, intelligent spellcasting, and careful attention to passive bonuses, you can control nearly any encounter. Avoid high-risk spells, prioritize FP recovery, and use your skills to maximize uptime in fights. Whether you're soloing or in a team, this build lets you focus on what really matters: dealing safe, powerful damage while staying in the fight longer.

Frequently Asked Questions (FAQ)

Q1: What is the best relic for a Recluse build in Elden Ring: Nightreign?
A: The best relics include Grand Tranquil Scene, Bone-like Stone, and Knight of the Wise. All boost FP, Intelligence, or casting performance, which are essential for the Recluse class.

Q2: How do I unlock the Recluse's Chalice?
A: Complete the Recluse’s remembrance quest. The Chalice is awarded as part of the completion rewards.

Q3: Which spells work best with the Recluse class?
A: Stars of Ruin, Ranala’s Full Moon, and Dragon Fire are top-tier. Prioritize quick-cast spells to reduce vulnerability.

Q4: Can I benefit from passive effects of weapons even if I don’t equip them?
A: Yes. If a weapon with a passive skill is in your inventory, you gain its special effect regardless of whether it's equipped or its type.

Q5: What stats should I level for a Recluse build?
A: Focus on Intelligence and Mind for maximum FP pool and spellcasting power. Avoid spreading points too thin early on.

Q6: What’s the ideal level before major boss encounters?
A: Level 7–8 before Night One and level 11–12 before Night Two.

Q7: Which passive effects should I prioritize for this build?
A: FP regeneration, FP cost reduction, “less likely to be targeted,” and bonus spell damage are all highly beneficial.

Q8: Is Recluse good for team play?
A: Yes. The class's ability to regenerate HP and FP for allies via Soul Blood Song makes it highly effective in co-op situations.

Q9: What’s the biggest weakness of the Recluse build?
A: Low health and defense. You’ll need to rely on ranged casting, mobility, and strategic use of special effects to avoid being overwhelmed.

Q10: Should I use heavy armor with this build?
A: No. Stick to lightweight gear to maintain speed and casting agility. The build benefits from positioning, not tanking.


Share:

Mastering Ironeye: The Ultimate Elden Ring Nightreign Guide


Introduction

Welcome to your all-in-one guide for mastering Ironeye in Elden Ring: Nightreign. If you're looking for a powerful support class that also brings serious ranged damage to the table, Ironeye is the way to go. In this detailed breakdown, you'll learn exactly how to make the most of Ironeye’s abilities—from optimal weapon use to positioning, team synergy, and boss fight tactics. Whether you're brand new to the game or refining your build, this Nightreign Ironeye guide covers everything you need to start dominating as the best support class in Elden Ring.

We’ll go over ability mechanics, gear selection, upgrade routes, and real-time combat strategies to help you maximize your impact across PvE scenarios.

Understanding Ironeye’s Strengths and Role in Your Team

Ironeye in Elden Ring: Nightreign is best defined as a ranged support class. This character shines by combining damage output with team protection. The marked ability is at the heart of Ironeye's utility—it not only revives allies quickly but also increases the enemy's vulnerability, making them take 10% more damage and suffer heavier stagger buildup.

Key strengths include:

  • Excellent at interrupting boss mechanics (like sleep attacks).

  • Effective in kiting fast-moving enemies and flyers.

  • Allows your frontline to focus on aggro while you control spacing and crowd pressure.

  • Reliable at keeping stagger pressure on enemies, especially bosses.

The gameplay loop is simple but powerful: maintain your distance, mark enemies strategically, and punish mistakes with burst damage.


Core Combat Mechanics and Movement Mastery

Getting the basics right with Ironeye is critical. The key to staying alive and doing consistent damage lies in movement and attack precision. Here’s a breakdown of essential controls and techniques:

  • Two-Handing Your Bow: Use Y + RB or Triangle + R1 to enter two-hand mode. This boosts your damage and allows for quicker shot cycles.

  • Aiming and Shooting: LT to aim, RT to fire. You'll get more accuracy and flexibility, especially in mid- to long-range duels.

  • Jump-Back Shot: Dodge (B or Circle) + RT triggers a backstep attack. This move lets you maintain space while still dealing damage.

  • Triple Shot Sprint: Sprint forward and press RT to unleash three arrows. Use this to apply pressure or chase down weakened targets.

  • Skill Activation: With two-handing active, use RT again to activate your weapon skill or enchantment, if available.

Pro Tip: The charged ultimate (Y + RT) can pierce through multiple enemies. Holding the input lets you aim—ideal for lining up shots in boss fights or clustered mobs.

Weapon Selection and Upgrade Strategy for Ironeye

Success with Ironeye depends heavily on your weapon choices. While any bow works early on, certain options provide significant boosts depending on your target’s weaknesses.

Early Game Tips:

  • Find Element-Specific Bows – If you’re up against a lightning-weak boss, prioritize finding a lightning-infused bow.

  • Rare/Blue Weapons Are Worthwhile – Even if they don’t match your damage type perfectly, rare weapons can be upgraded further and faster.

  • Smithing Stones – Aim to collect Smithing Stone [2] by Day Two, especially from mines. These are key to boosting damage for mid-game fights.

Recommended Approach:

  • Search early areas for churches and bosses.

  • Loot based on enemy weaknesses (ping areas where a lightning, fire, or holy element can give you an edge).

  • Don’t forget to visit your Grace points frequently for upgrades.

Top Tip: Always have a secondary ranged option (like a wand or elemental bow) to exploit boss weaknesses.


Using Ironeye’s Marked Ability Effectively

The Marked Ability is what separates Ironeye from basic ranged characters. Not only is it a dash (comparable to Bloodhound Step), but it sets enemies up for team combos.

Benefits of Marking:

  • Targets take +10% damage from all sources.

  • Significantly increases stagger susceptibility.

  • Helps tanks and melee DPS secure staggers or criticals faster.

When to Use It:

  • Dash into an enemy and apply the mark before a team burst.

  • Use on fast or aerial targets to control the flow of the fight.

  • Apply during boss attack wind-ups—this allows your team to get a major damage spike while they’re exposed.

Stack Pressure: Keep hitting marked targets to prevent stagger bars from resetting. This is crucial in prolonged boss encounters.

Exploration and Day-One Priorities

Getting started right on Day One sets the tone for your entire run as Ironeye. Your goal early on should be to secure key upgrades and elemental gear to align with upcoming boss weaknesses.

What to Focus On:

  • Target Elemental Weaknesses – If you know a boss is weak to lightning, explore zones with lightning weapons.

  • Search for Greases – These consumables let you coat your bow with elemental effects for added power.

  • Secure Healing and Buff Items – These items become especially important since Ironeye has low health scaling.

Do Not Overcommit Early: Mines are great for Smithing Stones but avoid deep exploration until Day Two unless you're well-equipped. Save major grinding for later when your gear and stats catch up.

Key Locations to Prioritize:

  • Churches for buffs.

  • Mines (light exploration only).

  • Areas with rare item drops (blue-tier bows or greases).

Day Two Strategy: Upgrades and Evergaol Runs

Day Two is where your Ironeye build really starts to scale. With access to more materials and tougher challenges, you should focus on leveling up, finding Evergaols, and refining your playstyle.

Main Goals:

  • Level Up Regularly – Return to Grace points often and invest in Dexterity and Mind (for faster bow use and ability usage).

  • Find Evergaols – These reward around 10,000 runes and often contain useful loot like rare weapons or stat-boosting relics.

  • Gear Synergy – Start looking for weapons or artifacts that match Ironeye’s strengths (ranged damage, mobility, stagger support).

Survivability Tips:

  • Prioritize dodging upgrades like improved rolls or dash boosts.

  • Look for Wending Grace, which lets you revive once per life—game-changing for boss fights.

Adapt Based on Elemental Zones: If you enter a lightning-heavy area, pick gear that resists or enhances that damage type.


Boss Fight Strategy and Team Synergy

Ironeye isn’t just about dealing damage—it’s about positioning, timing, and setting your team up for success. Knowing how to handle boss fights is what elevates a good Ironeye into a game-changer.

General Boss Tactics:

  • Stay Behind the Boss: Most enemies have frontal AoEs. Stick to the rear or sides, allowing your tank to absorb aggro.

  • Use Ultimate Shot to Interrupt: Your Y + RT attack can disrupt abilities like the sleep move from the Augur fight.

  • Track Aggro Swaps: If the boss targets you (e.g., red chest mark), kite away from your team to reduce risk.

Supporting Your Team:

  • Constantly mark bosses to raise team damage.

  • Use ranged pressure to keep stagger bars active, aiding melee teammates in triggering criticals.

  • When a teammate is down, prioritize picking them up. Ironeye’s revive is one of the fastest in the game.

Avoid Overextending: Ironeye is not tanky. Don’t get greedy—stay mobile and use distance to your advantage.

Dealing with Groups and Fast Enemies

Crowd control is one of Ironeye’s hidden strengths. You’ll often find yourself facing waves of enemies or highly mobile units like flyers.

Tactics for Handling Multiple Targets:

  • Aim for the Weakest First: Focus down the lowest-health enemies to thin out the group.

  • Position High: Use terrain to get a better angle and avoid being surrounded.

  • Use Triple Shot Smartly: Sprint-shot (forward + RT) is ideal for groups when retreating isn't an option.

Special Cases:

  • Flyers and fast bosses (like Augur) are where Ironeye shines. Stay locked on, keep firing, and use dodge shots to maintain pressure.

  • When fighting multiple enemies, mark one to reduce group pressure and allow your team to collapse on that target faster.

Use Jump-Back Shots to escape quickly if surrounded. This move gives just enough spacing to reposition without taking a hit.

Late Game Tips and Advanced Tricks

By the late game, your Ironeye should feel like a fully realized support DPS class. At this point, maximizing your contribution depends on optimizing cooldowns, refining mark timing, and adjusting your loadout for each fight.

Late Game Focus Areas:

  • Elemental Swaps: Carry multiple bows or enchantments tailored to specific enemy weaknesses (e.g., Holy for Albanarox).

  • Critical Combos: Stack marked shots with teammate ultimates for massive burst.

  • Situational Magic Use: If you find yourself with underused FP, equip a wand or talisman for ranged elemental damage.

Important Reminder: Some bosses are resistant to piercing. Have a magic or elemental alternative ready to avoid being stuck in a damage drop-off.

Support Mentality Wins Games: Reviving allies, applying mark frequently, and controlling field presence is often more impactful than raw DPS.


Conclusion

Ironeye is one of the most versatile and rewarding classes in Elden Ring: Nightreign. With a mix of mobility, crowd control, and team support, this build offers a strong balance between survivability and pressure.

Whether you're pinning down flyers, keeping your team alive, or marking a boss to break its posture, playing Ironeye right means knowing when to stay back, when to mark, and when to unleash damage. Mastering these rhythms transforms you from a backline shooter to a frontline enabler.

Stick to ranged positioning, prioritize utility, and keep pressure on your enemies’ stagger bar. If you follow this guide, you’ll soon see why Ironeye is considered one of the best support roles in the game.


Frequently Asked Questions (FAQ)

Q: Is Ironeye good for beginners?
A: Yes. Ironeye has straightforward mechanics and is very forgiving thanks to its ranged style and revive ability.

Q: What stats should I focus on first?
A: Dexterity, Mind, and Endurance. These boost bow efficiency, ability usage, and movement.

Q: What weapon should I use?
A: Look for bows that match enemy weaknesses. Elemental bows (Lightning, Holy) are especially strong.

Q: Can Ironeye deal with bosses alone?
A: Yes, but it’s more effective in a team. It excels in supportive roles, softening up targets and reviving teammates.

Q: What is the best time to use the marked ability?
A: Before a damage burst from your team or to interrupt dangerous boss mechanics.

Q: Is Ironeye viable in all fights?
A: Mostly, yes. However, against high-resistance piercing enemies, you may need a backup magic or elemental weapon.


Share:

Trending Guides

Translate

Pageviews past week

Games

Guide Archive

Contact The Haplo Gaming Chef

Name

Email *

Message *